
Command-line tutorials and shell scripting | Power of Comman...
12K views · Aug 11, 2023 monibe.com
Command-line tutorials and shell scripting, Unlock the Power of Command Line: Comprehensive Command-line Tutorials and Shell Scripting. Welcome to a journey of command-line mastery, where we dive into essential command-line tutorials and delve into the world of shell scripting. Whether you're a Linux enthusiast or a curious learner, we've got you covered with step-by-step tutorials and practical examples. Join us as we explore a wide range of command-line topics, from foundational commands to advanced scripting techniques. Learn how to navigate directories, manipulate files, automate tasks, and harness the full potential of the command line. Get ready to elevate your technical prowess and confidently utilize command-line tools for efficient tasks and automation.

Cat Command in Linux | Cat Command
5K views · Aug 12, 2023 monibe.com
Cat Command in Linux, Unleash the Cat Command: Exploring File Content in Linux. In this informative tutorial, we delve into the versatile world of the 'cat' command in Linux, uncovering its functionalities for viewing and manipulating file content. Whether you're a Linux enthusiast or a curious learner, we've got you covered with steps of instructions and practical examples. Join us as we navigate through the commands and techniques needed to display text files, concatenate multiple files, and explore file content in a terminal window. Learn how to harness the power of 'cat' to analyze log files, extract data, and streamline your file management. Get ready to elevate your Linux skills and confidently wield the 'cat' command for efficient file handling.

How to Install Ubuntu 22.04 LTS | Installation Ubuntu
9K views · Aug 13, 2023 monibe.com
How to Install Ubuntu 22.04 LTS Unlock the Power of Ubuntu 22.04 LTS: A Complete Step-by-Step Installation Guide. In this comprehensive video, we dive into the intricacies of installing Ubuntu 22.04 LTS, providing you with a detailed and thorough walkthrough of the entire process. Whether you're new to Linux or a seasoned user, we've got you covered with clear and concise instructions that will help you set up your Ubuntu environment with confidence. Get started by learning how to prepare your system for the installation. We'll guide you through the essential steps of checking system requirements, ensuring hardware compatibility, and creating a bootable USB drive. By the end of this section, you'll be well-equipped to initiate the installation process. The installation itself is a breeze with our detailed step-by-step guidance. We'll explain how to boot from the USB drive, navigate through the installation wizard, and make crucial decisions such as partitioning your hard drive and selecting installation options. Our in-depth explanations ensure that you understand each choice you make along the way. Post-installation tasks are just as important, and we've got you covered there too. Discover how to configure essential settings, install software packages, and optimize your Ubuntu system for peak performance. By the end of this guide, you'll have a fully functional and personalized Ubuntu 22.04 LTS setup that suits your needs. Join us on this comprehensive journey as we demystify the Ubuntu 22.04 LTS installation process, empowering you to embrace the world of Linux with confidence. Whether you're a newcomer or a tech enthusiast, this guide is your key to unlocking the full potential of Ubuntu on your system.
How to Use the Linux Command Line | Linux Command Line
11K views · Aug 13, 2023 monibe.com
How to Use the Linux Command Line Unlocking the Power of the Linux Command Line: A Comprehensive Guide. Welcome to a journey of mastering the Linux command line, where we demystify the world of terminal commands and empower you with essential skills. In this tutorial, suitable for beginners and those seeking a deeper understanding, we delve into the fundamentals and techniques of using the Linux command line effectively. Let's start by introducing you to the command line interface and its importance in the Linux ecosystem. Discover how to access the terminal, navigate directories, and execute basic commands. We'll cover essential concepts like file paths, command syntax, and command options, providing you with a solid foundation. Dive deeper into the command line world as we explore more advanced commands and tasks. Learn how to manipulate files and directories, search for content, manage processes, and customize your environment. We'll guide you through real-world examples that showcase the power and versatility of the command line. It's time to take your command line skills to the next level by understanding pipelines, redirection, and scripting. Discover how to combine commands, redirect input and output, and create simple scripts to automate tasks. By the end of this guide, you'll have the confidence to use the Linux command line as a powerful tool for system administration, troubleshooting, and efficient daily tasks. Join us on this educational journey as we equip you with the knowledge and expertise to navigate the Linux command line with ease. Whether you're a newcomer or an aspiring Linux guru, this guide is your gateway to unlocking the true potential of the command line interface.

How to Use the Linux Command Line |
3K views · Aug 13, 2023 monibe.com
How to Use the Linux Command Line Mastering the Linux Command Line: Your Comprehensive Guide. Welcome to an in-depth exploration of the Linux command line, where we unravel its mysteries and equip you with essential skills. This tutorial is designed for beginners and those looking to enhance their command line expertise. Join us as we delve into the fundamental concepts and practical techniques of using the Linux command line effectively. Embark on your journey by understanding the basics of the command line interface. Learn how to navigate directories, manipulate files, and execute commands. We'll provide clear explanations and real-world examples to ensure you grasp the essentials. Dive deeper into the command line world as we introduce advanced commands and techniques. Discover how to manage processes, customize your environment, and perform system tasks. By the end of this guide, you'll have the confidence to tackle a wide range of command line tasks and optimize your Linux experience. Unlock the potential of the Linux command line with this comprehensive guide. Whether you're a novice or a seasoned user, our step-by-step approach will empower you to navigate, manipulate, and harness the power of the command line with ease.

How to Install Docker on Ubuntu | Lnstallation Docker on Ubu...
17K views · Aug 13, 2023 monibe.com
How to Install Docker on Ubuntu Installing Docker on Ubuntu: A Comprehensive Step-by-Step Guide. Welcome to a detailed tutorial on setting up Docker on your Ubuntu system. Whether you're new to Docker or looking for a comprehensive installation guide, this tutorial is designed to provide you with a clear and thorough walkthrough of the process. Begin your Docker journey by understanding the importance of containerization and its benefits. Learn how Docker simplifies software deployment and management. In the first part of the guide, we'll walk you through the process of preparing your Ubuntu system for Docker installation. Next, we'll guide you through the step-by-step Docker installation process. You'll discover how to add Docker's official repository, update your package index, and install Docker CE. We'll provide detailed explanations for each command and decision, ensuring you have a solid understanding of the installation process. Once Docker is successfully installed, we'll demonstrate how to verify its status and basic functionality. You'll learn how to run your first Docker container, explore Docker images, and manage containers using essential Docker commands. Join us on this journey to set up Docker on your Ubuntu system and unlock the power of containerization. By the end of this guide, you'll have the skills to confidently install and start using Docker to streamline your development and deployment workflows.

How to Install Kubernetes on Ubuntu | Installing Kubernetes ...
36K views · Aug 13, 2023 monibe.com
How to Install Kubernetes on Ubuntu Setting Up Kubernetes on Ubuntu: A Comprehensive Step-by-Step Guide. Welcome to an extensive tutorial on installing Kubernetes on your Ubuntu system. Whether you're new to Kubernetes or looking to set up your own Kubernetes cluster, this guide will walk you through the process, providing clear explanations and practical steps. Begin your Kubernetes journey by understanding the fundamentals of container orchestration and the role of Kubernetes in managing containerized applications. In the initial part of the guide, we'll help you prepare your Ubuntu system for Kubernetes installation, ensuring it meets the necessary prerequisites. Next, we'll guide you through the step-by-step process of installing Kubernetes on your Ubuntu system. You'll learn how to set up the Kubernetes control plane, configure network policies, and deploy worker nodes. We'll explain each command and configuration, ensuring you have a solid grasp of the installation process. Once Kubernetes is up and running, we'll explore how to interact with your cluster using kubectl, the Kubernetes command-line tool. You'll discover how to deploy applications, manage pods, and scale your workloads using Kubernetes features. Join us on this journey to set up Kubernetes on your Ubuntu system and unlock the power of container orchestration. By the end of this guide, you'll have the skills to confidently install and manage Kubernetes, enabling you to efficiently deploy and scale applications.

How to Harden Your Linux System | Linux Security
1K views · Aug 13, 2023 monibe.com
How to Harden Your Linux System Strengthening Your Linux System: Guide to Hardening. Welcome to a detailed tutorial on enhancing the security of your Linux system through effective hardening techniques. Whether you're new to Linux security or seeking to bolster your system's defenses, this guide will walk you through the process step by step. Begin your journey by understanding the importance of system hardening and the potential risks your Linux system may face. In the first part of the guide, we'll explore the fundamental principles of system hardening and why it's essential for safeguarding your data and applications. Next, we'll guide you through practical steps to harden your Linux system. You'll learn how to secure user accounts, implement strong authentication mechanisms, and apply access controls to minimize vulnerabilities. We'll also delve into system updates, ensuring your software is up to date and protected against known security threats. As we progress, you'll discover how to secure network services, configure firewalls, and monitor system logs for suspicious activities. We'll cover essential security tools and practices that will help you actively defend your Linux environment against potential threats. Join us on this comprehensive journey to harden your Linux system and elevate its security posture. By the end of this guide, you'll have the knowledge and skills to confidently implement robust security measures, ensuring the integrity and resilience of your Linux environment.

How to Create a Linux Virtual Machine | Linux VM
9K views · Aug 13, 2023 monibe.com
How to Create a Linux Virtual Machine Discover the world of virtualization as we take you through the process of creating a Linux virtual machine (VM). This comprehensive guide is designed to help both beginners and those looking to expand their virtualization skills. Join us as we unravel the steps to set up your own Linux VM, offering flexibility, convenience, and the opportunity to explore different Linux distributions. Step 1: Understanding Virtualization Begin by grasping the concept of virtualization and its benefits. Learn how virtual machines allow you to run multiple operating systems on a single physical machine, enabling efficient resource utilization and isolated environments. Step 2: Choosing a Hypervisor Select a hypervisor that suits your needs. We'll explore popular options like VirtualBox and VMware, guiding you through installation and setup procedures to prepare your system for virtualization. Step 3: Downloading a Linux Distribution Decide on the Linux distribution you'd like to use in your VM. Whether it's Ubuntu, CentOS, or another flavor, we'll guide you through downloading the necessary ISO image. Step 4: Creating a Virtual Machine Learn how to create a new VM within your chosen hypervisor. We'll walk you through configuration settings, such as memory allocation, storage options, and networking preferences. Step 5: Installing Linux Follow along as we install the chosen Linux distribution on your VM. We'll provide detailed instructions and tips to ensure a smooth installation process. Step 6: Configuring the VM Customize your VM settings post-installation. From adding additional software to adjusting hardware resources, we'll empower you to tailor your VM to your needs. Step 7: Exploring Virtualization Features Delve into advanced virtualization features, including snapshots, cloning, and virtual networking. Understand how these tools can enhance your VM management and usage. By the end of this guide, you'll have a fully functional Linux virtual machine at your fingertips. Embrace the world of virtualization and explore Linux without altering your host system. Unleash the potential of virtual machines and broaden your Linux horizons.

How to Use Ansible to Manage Linux Servers | Installing Ansi...
2K views · Aug 13, 2023 monibe.com
How to Use Ansible to Manage Linux Servers Welcome to an in-depth tutorial on using Ansible to efficiently manage your Linux servers. Whether you're a system administrator, DevOps engineer, or simply eager to streamline server management, this guide will walk you through the process, from installation to practical usage. Step 1: Introducing Ansible Begin by understanding the power of Ansible as a configuration management and automation tool. Learn how Ansible simplifies server management tasks by allowing you to define infrastructure as code and automate repetitive processes. Step 2: Setting Up Ansible Discover the process of installing Ansible and preparing your environment for effective server management. We'll guide you through installation on both the control machine and target servers. Step 3: Creating Inventory Learn how to build an inventory file that defines the servers you want to manage. We'll explore dynamic inventory options and demonstrate how to organize your server infrastructure efficiently. Step 4: Writing Playbooks Dive into the heart of Ansible with playbooks. We'll show you how to write YAML-based playbooks to define tasks, configurations, and desired states for your servers. Step 5: Executing Tasks Execute your playbooks and tasks across your server infrastructure. Witness the power of Ansible in action as it automates tasks such as package installation, configuration file management, and service deployment. Step 6: Roles and Reusability Discover the concept of roles, enabling you to organize your playbooks and make them reusable across projects. We'll guide you through creating, structuring, and sharing roles for efficient server management. Step 7: Advanced Ansible Techniques Delve into advanced Ansible techniques, including variable management, conditionals, and loops. Learn how to handle complex scenarios and create dynamic configurations. Empower yourself with the skills to effectively manage your Linux servers using Ansible. By the end of this guide, you'll have a solid understanding of Ansible's capabilities and be ready to implement efficient server management strategies.

How to Set Up a Firewall on Linux | Firewall on Linux system
11K views · Aug 13, 2023 monibe.com
How to Set Up a Firewall on Linux Welcome to a comprehensive tutorial on establishing a firewall on your Linux system. In a digital landscape fraught with security risks, mastering firewall configuration is essential to safeguarding your data and system integrity. Join us as we navigate through the process of setting up a robust firewall for your Linux environment. Step 1: Understanding Firewall Basics Begin by delving into the fundamentals of firewalls. Gain insights into how firewalls work, their role in network security, and the types of threats they can mitigate. Step 2: Choosing a Firewall Solution Explore various firewall solutions available for Linux, including iptables and firewalld. We'll guide you through the decision-making process and help you select the right tool for your needs. Step 3: Setting Up iptables Learn how to use iptables, a powerful and flexible firewall utility. We'll provide detailed instructions on creating and managing firewall rules, allowing you to control incoming and outgoing traffic effectively. Step 4: Embracing firewalld Discover the user-friendly firewalld, a dynamic firewall management tool. Navigate through its intuitive interface to configure zones, services, and rules for enhanced security. Step 5: Implementing Common Scenarios Explore practical firewall scenarios to fortify your Linux system. From allowing essential services to blocking malicious traffic, we'll walk you through real-world examples to ensure your firewall is optimized for your requirements. Step 6: Testing and Monitoring Ensure your firewall is functioning as intended by conducting thorough testing. Learn how to monitor firewall activity, analyze logs, and make adjustments based on observed patterns. Step 7: Ongoing Firewall Maintenance Security is a continuous process. We'll provide guidance on maintaining and updating your firewall rules to adapt to evolving threats and changes in your network environment. By the end of this guide, you'll have the skills to establish a strong firewall presence on your Linux system. Bolster your defenses, enhance your network security, and gain the confidence to navigate the dynamic landscape of cybersecurity.

How to Use Cron Jobs on Linux |
4K views · Aug 13, 2023 monibe.com
How to Use Cron Jobs on Linux Welcome to a step-by-step tutorial on harnessing the power of cron jobs in your Linux environment. Cron jobs are a crucial tool for automating recurring tasks, streamlining your workflow, and ensuring optimal system performance. Join us as we explore the intricacies of setting up and managing cron jobs on your Linux system. Step 1: Introducing Cron Jobs Begin by understanding the concept of cron jobs and their significance in task automation. Learn how cron jobs enable you to schedule and execute commands at predefined intervals. Step 2: Accessing the Cron Tab Navigate the Linux cron tab, the central location for managing cron jobs. We'll guide you through accessing and editing this tab, providing insights into its structure and organization. Step 3: Creating and Editing Cron Jobs Learn how to create and modify cron jobs using the appropriate syntax. We'll showcase examples of common cron job setups, including running scripts, commands, and scheduled tasks. Step 4: Specifying Cron Job Frequencies Explore the flexibility of cron job scheduling by delving into time-based specifications. Discover how to set up precise execution intervals, from hourly and daily to monthly and custom time frames. Step 5: Handling Output and Notifications Enhance your cron job management by configuring output redirection and notifications. We'll show you how to capture command output and receive email alerts for task statuses. Step 6: Managing Cron Jobs Master the art of maintaining and troubleshooting your cron jobs. Learn how to list, edit, and remove existing cron jobs, ensuring your automation remains efficient and error-free. Step 7: Best Practices and Security Discover essential best practices for using cron jobs responsibly and securely. We'll cover topics like user access, script locations, and avoiding common pitfalls. By the end of this guide, you'll be well-equipped to wield the power of cron jobs, optimizing task automation and increasing your Linux productivity.

How to Use SSH to Securely Access Linux Servers | SSH to Lin...
22K views · Aug 13, 2023 monibe.com
How to Use SSH to Securely Access Linux Servers Welcome to an essential tutorial on utilizing SSH (Secure Shell) to establish secure connections and access your Linux servers. In today's digital landscape, safeguarding sensitive data during remote access is paramount. Join us as we demystify SSH, providing you with the skills to securely manage your Linux servers from anywhere. Step 1: Understanding SSH Begin by grasping the concept of SSH and its role in secure communication. Learn how SSH encryption ensures confidentiality, integrity, and authenticity during remote sessions. Step 2: Installing OpenSSH Navigate through the process of installing OpenSSH, the most widely used SSH implementation for Linux. We'll guide you through the installation steps and necessary configurations. Step 3: Generating SSH Key Pairs Enhance security by generating SSH key pairs. Discover the process of creating public and private keys, and learn how to securely manage and distribute them. Step 4: Establishing SSH Connections Put your knowledge into practice by initiating SSH connections to your Linux servers. We'll show you how to access servers using password authentication and key-based authentication. Step 5: Securing SSH Connections Explore advanced techniques to further secure your SSH connections. Learn how to change default SSH ports, disable root login, and use SSH agent forwarding. Step 6: Simplifying Remote Access with Configurations Streamline your SSH experience by configuring the SSH client. Customize connection settings, manage multiple SSH profiles, and create shortcuts for quick and secure access. Step 7: Enhancing Security with Two-Factor Authentication Discover the power of two-factor authentication for an added layer of security. Learn how to implement time-based one-time passwords (TOTPs) to fortify your SSH connections. By the end of this guide, you'll have a comprehensive understanding of SSH and the ability to establish secure connections to your Linux servers. Empower yourself with the knowledge to manage your servers remotely while prioritizing data protection and confidentiality.

How to Install Nginx on Ubuntu | Installing Nginx on Ubuntu ...
16K views · Aug 13, 2023 monibe.com
How to Install Nginx on Ubuntu Welcome to an essential tutorial on setting up Nginx, a high-performance web server, on your Ubuntu system. Nginx is a versatile tool that can enhance the performance and scalability of your web applications. Join us as we navigate through the installation process, enabling you to harness the full potential of Nginx for your Ubuntu-based projects. Step 1: Introducing Nginx Begin by understanding the power of Nginx as a web server and reverse proxy. Learn how Nginx efficiently handles client requests and manages traffic distribution. Step 2: Preparing Your Ubuntu System Before installing Nginx, ensure your Ubuntu system is up to date. We'll guide you through the process of updating and upgrading your packages for a smooth installation. Step 3: Installing Nginx Navigate through the installation of Nginx using the Ubuntu package manager. We'll walk you through the command-line steps, ensuring you have Nginx up and running in no time. Step 4: Basic Nginx Configuration Learn the basics of Nginx configuration files. We'll show you how to locate key files, such as the main configuration and site-specific configuration files, and make essential modifications. Step 5: Managing Nginx Services Explore techniques for managing the Nginx service on your Ubuntu system. Discover how to start, stop, restart, and enable the Nginx service to ensure continuous operation. Step 6: Creating Nginx Virtual Hosts Dive into the world of virtual hosts with Nginx. Learn how to set up and configure multiple virtual hosts to host multiple websites on a single server. Step 7: Securing Your Nginx Server Prioritize security by implementing SSL/TLS certificates on your Nginx server. We'll guide you through obtaining and installing Let's Encrypt certificates to enable HTTPS. By the end of this guide, you'll have a solid understanding of Nginx installation and configuration on your Ubuntu system. Unlock the potential of this powerful web server to optimize your web applications and deliver seamless user experiences.
How to Install MySQL on Ubuntu | Setting up MySQL on Ubuntu
55K views · Aug 13, 2023 monibe.com
How to Install MySQL on Ubuntu Welcome to an essential tutorial on setting up MySQL, a popular open-source relational database management system, on your Ubuntu system. MySQL plays a crucial role in powering dynamic web applications and managing data. Join us as we navigate through the installation process, empowering you to harness the capabilities of MySQL for your Ubuntu-based projects. Step 1: Introduction to MySQL Begin by understanding the significance of MySQL as a robust and scalable database solution. Learn how MySQL facilitates efficient data storage, retrieval, and management. Step 2: Preparing Your Ubuntu System Before installing MySQL, ensure your Ubuntu system is optimized. We'll guide you through updating and upgrading packages, setting the appropriate timezone, and other necessary preparations. Step 3: Installing MySQL Navigate through the installation of MySQL using the Ubuntu package manager. We'll walk you through the command-line steps, ensuring a seamless and successful installation. Step 4: Basic MySQL Configuration Learn the basics of MySQL configuration. We'll cover essential concepts like user management, setting passwords for the root user, and securing your MySQL installation. Step 5: Exploring MySQL Client Tools Discover MySQL client tools that facilitate database interactions. We'll showcase how to connect to MySQL, execute queries, and manage databases using the command-line client. Step 6: Managing MySQL Services Explore techniques for managing the MySQL service on your Ubuntu system. Learn how to start, stop, and restart the MySQL service to ensure optimal database operation. Step 7: Interacting with MySQL Databases Dive into practical database operations. We'll demonstrate how to create databases, tables, and perform CRUD (Create, Read, Update, Delete) operations using MySQL. By the end of this guide, you'll be equipped with the knowledge to install and configure MySQL on your Ubuntu system. Unlock the potential of this powerful database management system to efficiently store and manage your data.

How to Install PHP on Ubuntu | Installing PHP on Ubuntu Syst...
31K views · Aug 13, 2023 monibe.com
How to Install PHP on Ubuntu Welcome to an essential tutorial on setting up PHP, a versatile scripting language for web development, on your Ubuntu system. PHP plays a pivotal role in creating dynamic and interactive web applications. Join us as we navigate through the installation process, equipping you with the skills to harness PHP's capabilities for your Ubuntu-based projects. Step 1: Introducing PHP Begin by understanding the significance of PHP in modern web development. Learn how PHP enables you to embed dynamic content and functionality within your web pages. Step 2: Preparing Your Ubuntu System Before installing PHP, ensure your Ubuntu system is optimized. We'll guide you through updating packages, setting timezone preferences, and other necessary preparations. Step 3: Installing PHP Navigate through the installation of PHP using the Ubuntu package manager. We'll walk you through the command-line steps, ensuring a seamless integration of PHP with your Ubuntu environment. Step 4: Testing PHP Installation Validate your PHP installation by creating a basic PHP script. We'll show you how to set up a simple web server and execute PHP code to ensure PHP is functioning as expected. Step 5: Interacting with Databases using PHP Discover how PHP seamlessly interacts with databases. Learn how to establish connections to MySQL databases and execute queries to retrieve and manipulate data. Step 6: Exploring PHP Extensions Explore PHP's versatility through extensions. We'll introduce you to common PHP extensions that expand its capabilities, enabling you to enhance your web applications. Step 7: Deploying PHP Web Applications Learn how to deploy PHP-based web applications on your Ubuntu server. We'll guide you through configuring virtual hosts and setting up your web application for optimal performance. By the end of this guide, you'll have a solid foundation in installing and utilizing PHP on your Ubuntu system. Unleash the power of PHP to create dynamic, interactive, and feature-rich web applications.

How to Install WordPress on Ubuntu
2K views · Aug 13, 2023 monibe.com
How to Install WordPress on Ubuntu
How to Install Docker on CentOS | Installing Docker on CentO...
8K views · Aug 13, 2023 monibe.com
How to Install Docker on CentOS Welcome to a comprehensive tutorial on setting up Docker, a powerful platform for containerization, on your CentOS system. Docker revolutionizes software deployment, making it efficient, scalable, and consistent. Join us as we navigate through the installation process, equipping you with the skills to harness Docker's capabilities on your CentOS environment. Step 1: Introduction to Docker Begin by understanding the significance of Docker in modern software development. Learn how Docker containers enable the packaging and isolation of applications and their dependencies. Step 2: Preparing Your CentOS System Before installing Docker, ensure your CentOS environment is optimized. We'll guide you through updating packages, setting up repositories, and other necessary preparations. Step 3: Installing Docker Navigate through the installation of Docker using CentOS's package manager. We'll walk you through the command-line steps, ensuring a seamless integration of Docker with your CentOS system. Step 4: Testing Docker Installation Validate your Docker installation by creating and running your first Docker container. We'll demonstrate how to pull and run a pre-built Docker image to ensure Docker is functioning as expected. Step 5: Interacting with Docker Containers Discover practical techniques for managing Docker containers. Learn how to start, stop, restart, and remove containers, as well as inspect container logs and execute commands within containers. Step 6: Building Docker Images Explore the process of creating custom Docker images for your applications. We'll guide you through creating Dockerfiles and building images, enabling you to package your applications with all required dependencies. Step 7: Networking and Docker Compose Dive into Docker networking and orchestration with Docker Compose. Learn how to create and manage networks, and how to define and deploy multi-container applications using Compose. By the end of this guide, you'll have a solid foundation in installing and utilizing Docker on your CentOS system. Unleash the power of containerization to streamline your software deployment and management processes.

How to Install Kubernetes on CentOS | Installation Kubernete...
15K views · Aug 13, 2023 monibe.com
How to Install Kubernetes on CentOS Welcome to an in-depth tutorial on setting up Kubernetes, the industry-standard container orchestration platform, on your CentOS system. Kubernetes empowers you to manage, deploy, and scale containerized applications effortlessly. Join us as we navigate through the installation process, equipping you with the skills to harness Kubernetes's capabilities on your CentOS environment. Step 1: Introduction to Kubernetes Begin by understanding the significance of Kubernetes in modern application deployment. Learn how Kubernetes automates container management, ensuring seamless scalability and reliability. Step 2: Preparing Your CentOS System Before installing Kubernetes, ensure your CentOS environment is optimized. We'll guide you through updating packages, configuring networking, and other necessary preparations. Step 3: Installing Kubernetes Navigate through the installation of Kubernetes using Kubernetes' preferred installation tool, kubeadm. We'll walk you through the command-line steps, ensuring a smooth setup of the Kubernetes control plane and worker nodes. Step 4: Verifying Kubernetes Installation Validate your Kubernetes installation by inspecting the health and status of your cluster components. We'll demonstrate how to ensure that all components are up and running. Step 5: Deploying Applications with kubectl Discover the power of kubectl, the Kubernetes command-line tool. Learn how to create and manage Kubernetes resources, deploy applications, and scale your workloads. Step 6: Exploring Kubernetes Concepts Dive into key Kubernetes concepts such as pods, services, and deployments. We'll explain how these components work together to create a resilient and highly available application environment. Step 7: Advanced Kubernetes Features Explore advanced Kubernetes features, including persistent storage, networking, and secrets management. Learn how to create storage volumes, configure networking, and secure sensitive information. By the end of this guide, you'll have a solid foundation in installing and utilizing Kubernetes on your CentOS system. Unleash the power of container orchestration to manage and scale your applications with ease.

How to Harden Your CentOS System | CentOS System Hardening
408 views · Aug 13, 2023 monibe.com
How to Harden Your CentOS System Welcome to a crucial tutorial on hardening your CentOS system to enhance its security and protect it from potential threats. Hardening your system is a fundamental step in safeguarding sensitive data and ensuring the integrity of your environment. Join us as we navigate through the process of fortifying your CentOS system, equipping you with essential practices to create a robust and secure computing environment. Step 1: Introduction to System Hardening Begin by understanding the importance of system hardening in the context of cybersecurity. Learn how hardening practices can mitigate vulnerabilities and reduce the risk of unauthorized access. Step 2: Preparing for System Hardening Before implementing hardening measures, ensure your CentOS environment is ready. We'll guide you through necessary preparations, including backup and documentation. Step 3: User and Access Management Navigate through essential user and access management techniques. Learn how to configure user accounts, implement strong password policies, and manage user privileges effectively. Step 4: Securing Network Services Discover best practices for securing network services. We'll cover techniques such as firewall configuration, service disablement, and intrusion detection. Step 5: Patch Management Learn the significance of regular patching and updates. We'll guide you through keeping your system up to date to address vulnerabilities and improve system security. Step 6: Logging and Monitoring Dive into the world of logging and monitoring to detect and respond to potential security incidents. Explore techniques for setting up and analyzing system logs. Step 7: System Auditing and Compliance Explore system auditing and compliance to ensure your system adheres to industry standards. Learn how to perform security audits and assess your system's security posture. By the end of this guide, you'll possess the knowledge to harden your CentOS system effectively, creating a fortified environment that mitigates risks and safeguards your data.

How to Use the Linux Terminal | Linux Terminal Techniques
8K views · Aug 13, 2023 monibe.com
How to Use the Linux Terminal Welcome to an essential tutorial on harnessing the power of the Linux terminal. The terminal is a versatile and potent tool that allows you to interact with your Linux system efficiently and perform a wide range of tasks. Join us as we embark on a journey through the ins and outs of the Linux terminal, empowering you with the skills to navigate, manage files, and execute commands seamlessly. Step 1: Introduction to the Linux Terminal Begin by understanding the significance of the terminal in Linux. Learn how the terminal provides direct access to your system's inner workings and how mastering it can elevate your Linux experience. Step 2: Navigating the File System Navigate through your system's file structure like a pro. We'll guide you through essential commands to list directories, move between folders, and access files effortlessly. Step 3: File and Directory Management Discover techniques to manage files and directories efficiently. Learn how to create, copy, move, rename, and delete files and folders using command-line magic. Step 4: Text Manipulation and Viewing Unleash the power of text manipulation and viewing. We'll cover commands to create and edit text files, as well as techniques to display file content and search for specific patterns. Step 5: System Monitoring and Maintenance Dive into system monitoring and maintenance. Explore commands to check system status, manage processes, and troubleshoot issues using the terminal's diagnostic capabilities. Step 6: Package Management Learn how to wield the terminal to manage software packages on your system. We'll introduce you to package management commands that ensure your system is up to date and secure. Step 7: Advanced Terminal Techniques Discover advanced terminal techniques to streamline your workflow. From using wildcards for powerful file manipulation to creating aliases for frequently used commands, you'll become a terminal virtuoso. By the end of this guide, you'll have mastered the art of the Linux terminal, equipping you with the prowess to confidently navigate, manage, and command your Linux system using the command line.

How to Install Git on Linux | Installing Git on Linux
7K views · Aug 13, 2023 monibe.com
How to Install Git on Linux Welcome to a fundamental tutorial on installing Git, the world's leading distributed version control system, on your Linux system. Git revolutionizes software development by enabling efficient collaboration and version tracking. Join us as we navigate through the installation process, equipping you with the skills to integrate Git seamlessly into your Linux environment. Step 1: Introduction to Git Begin by understanding the significance of Git in modern software development. Learn how Git enhances version control, enables team collaboration, and streamlines code management. Step 2: Preparing Your Linux Environment Before installing Git, ensure your Linux environment is optimized. We'll guide you through updating packages and ensuring a smooth installation process. Step 3: Installing Git Navigate through the installation of Git on your Linux system. We'll walk you through the command-line steps to ensure Git is set up and ready for use. Step 4: Configuring Git Discover essential Git configurations. Learn how to set your name and email address, ensuring accurate attribution for your commits. Step 5: Cloning and Creating Repositories Dive into the world of Git repositories. Learn how to clone existing repositories and create new ones to start managing your code effectively. Step 6: Committing and Pushing Changes Explore the heart of Git's functionality. We'll cover committing changes to your repository and pushing them to remote repositories, ensuring your codebase is up to date. Step 7: Collaborative Workflow Unlock the power of collaborative development using Git. Learn how to collaborate with others by branching, merging, and resolving conflicts. By the end of this guide, you'll be equipped with the skills to install and utilize Git on your Linux system, enabling efficient version control and seamless collaboration in your software development projects.

AWK command in UnixLinux with examples | 'awk' comma...
4K views · Aug 15, 2023 monibe.com
AWK command in UnixLinux with examples Welcome to an illuminating tutorial on harnessing the capabilities of the 'awk' command in Unix/Linux. The 'awk' command is a powerful text processing tool that enables you to manipulate and analyze structured text data. Join us as we dive into the world of 'awk' command usage, equipping you with the skills to efficiently process and transform text data for various tasks. Understanding the 'awk' Command Begin by understanding the fundamental concepts of the 'awk' command. Learn how 'awk' excels in processing structured text data with its pattern-action mechanism. Basic 'awk' Syntax and Usage Navigate through the basic syntax and usage of the 'awk' command. We'll guide you through the essential components and options to get you started. Extracting Data with 'awk' Discover how to extract specific columns and fields from your text data using 'awk'. Learn how to use field separators to target and extract relevant information. Applying Conditions and Patterns Dive into the world of conditions and patterns in 'awk'. Explore how you can define rules to process data based on specific conditions. Mathematical Operations with 'awk' Uncover how 'awk' enables you to perform mathematical operations on your text data. Learn how to compute and display results using 'awk'. Using Built-in Functions Explore the built-in functions of 'awk'. We'll guide you through using pre-defined functions to enhance your text processing capabilities. Advanced 'awk' Techniques Delve into advanced 'awk' techniques for complex tasks. Learn how to aggregate data, perform calculations, and generate custom reports. Practical 'awk' Examples Explore practical applications of the 'awk' command. We'll provide real-world examples and scenarios to demonstrate the versatility of 'awk'. Best Practices and Script Optimization Navigate through best practices for efficient 'awk' usage. Learn how to structure your 'awk' commands for readability, maintainability, and optimal performance. By the end of this guide, you'll be well-versed in utilizing the 'awk' command to process and transform structured text data, enabling you to confidently manipulate and analyze text for a wide range of Unix/Linux tasks.

grep command in UnixLinux | 'grep' command
24K views · Aug 15, 2023 monibe.com
grep command in UnixLinux Welcome to an enlightening tutorial on unleashing the power of the 'grep' command in Unix/Linux. The 'grep' command is a versatile tool that enables you to search for specific patterns and text strings within files and directories. Join us as we dive into the world of 'grep' command usage, equipping you with the skills to efficiently search and extract information from your text data. Introduction to the 'grep' Command Begin by understanding the importance of the 'grep' command in text searching. Learn how 'grep' facilitates quick and accurate pattern matching and extraction. Basic 'grep' Syntax and Usage Navigate through the basic syntax and usage of the 'grep' command. We'll guide you through essential options and parameters to get you started. Searching Within Files Discover how to search for specific patterns within files using 'grep'. Learn how to specify search patterns and target multiple files simultaneously. Recursive Searching and Directories Dive into the world of recursive searching and directory scanning with 'grep'. Explore how to search within multiple directories and their subdirectories. Using Regular Expressions with 'grep' Uncover the power of regular expressions in 'grep'. We'll explore how to create advanced search patterns for precise and flexible searching. Displaying Line Numbers and Counting Matches Explore techniques to display line numbers and count matches in 'grep' results. Learn how to enhance your search output for better analysis. Excluding Patterns and Files Delve into methods for excluding specific patterns and files from 'grep' searches. We'll guide you through strategies to refine your search results. Practical 'grep' Examples Explore practical applications of the 'grep' command. We'll provide real-world examples and scenarios to demonstrate the versatility of 'grep'. Best Practices and Script Optimization Navigate through best practices for efficient 'grep' usage. Learn how to structure your 'grep' commands for readability, maintainability, and optimal performance. By the end of this guide, you'll be well-versed in harnessing the 'grep' command to perform efficient and accurate text searches, enabling you to confidently locate and extract information from your Unix/Linux text data.

cut command in Linux with examples | 'cut' commands
15K views · Aug 15, 2023 monibe.com
cut command in Linux with examples Welcome to an illuminating tutorial on harnessing the capabilities of the 'cut' command in Linux. The 'cut' command is a powerful tool that allows you to extract specific columns or fields from text data. Join us as we dive into the world of 'cut' command usage, equipping you with the skills to efficiently manipulate and extract information from your text files. Introduction to the 'cut' Command Begin by understanding the significance of the 'cut' command in text manipulation. Learn how 'cut' provides a streamlined approach to extracting specific portions of text data. Basic 'cut' Syntax and Usage Navigate through the basic syntax and usage of the 'cut' command. We'll guide you through the essential options and parameters to get you started. Extracting Columns and Fields Discover how to extract specific columns and fields from your text data using 'cut'. Learn how to define delimiters and specify column ranges for extraction. Custom Delimiters and Output Dive into the world of custom delimiters and output formatting with 'cut'. Explore how to manipulate delimiter characters and customize your extraction results. Combining 'cut' with Other Commands Uncover techniques to combine the power of 'cut' with other commands. We'll guide you through scenarios where 'cut' complements other text processing tools. Working with Character Positions Explore methods to work with specific character positions within your text data using 'cut'. Learn how to extract characters based on their positions. Practical 'cut' Examples Experience practical applications of the 'cut' command. We'll provide real-world examples and scenarios to showcase the versatility of 'cut'. Best Practices and Script Optimization Navigate through best practices for efficient 'cut' usage. Learn how to structure your 'cut' commands for readability, maintainability, and optimal performance. By the end of this guide, you'll be well-equipped with the knowledge to leverage the 'cut' command for precise text extraction and manipulation, enabling you to confidently extract specific information from your Linux text files.

cp command in Linux with examples | 'cp' commands
9K views · Aug 15, 2023 monibe.com
cp command in Linux with examples Welcome to an enlightening tutorial on mastering the 'cp' command in Linux. The 'cp' command is a fundamental tool that enables you to copy files and directories with precision and ease. Join us as we dive into the world of 'cp' command usage, equipping you with the skills to efficiently copy and manage your files and directories. Introduction to the 'cp' Command Begin by understanding the importance of the 'cp' command in file management. Learn how 'cp' empowers you to duplicate files and directories seamlessly. Basic 'cp' Syntax and Usage Navigate through the basic syntax and usage of the 'cp' command. We'll guide you through essential options and parameters to get you started. Copying Files and Directories Discover how to copy single files and entire directories using 'cp'. Learn how to preserve attributes, permissions, and ownership during copying. Interactive and Verbose Copying Dive into interactive and verbose copying modes with 'cp'. Explore how to interactively manage file conflicts and receive detailed progress information. Recursive Copying and Directory Structure Uncover techniques for recursive copying and preserving directory structures. Learn how to copy entire directory trees while maintaining organization. Copying with Permissions and Attributes Explore methods to copy files while preserving permissions, timestamps, and other attributes. We'll guide you through strategies to ensure accurate replication. Practical 'cp' Examples Experience practical applications of the 'cp' command. We'll provide real-world examples and scenarios to demonstrate the versatility of 'cp'. Best Practices and Script Optimization Navigate through best practices for efficient 'cp' usage. Learn how to structure your 'cp' commands for readability, maintainability, and optimal performance. By the end of this guide, you'll be well-equipped with the knowledge to effectively utilize the 'cp' command for seamless file copying and directory management, enabling you to confidently duplicate and organize your files in Linux.

ZIP command in Linux with examples | 'zip' command u...
10K views · Aug 15, 2023 monibe.com
ZIP command in Linux with examples Welcome to a comprehensive tutorial on harnessing the capabilities of the 'zip' command in Linux. The 'zip' command is a versatile tool that empowers you to compress and archive files and directories efficiently. Join us as we delve into the world of 'zip' command usage, equipping you with the skills to effectively compress, archive, and manage your data. Introduction to the 'zip' Command Begin by understanding the significance of the 'zip' command in compression and archiving. Learn how 'zip' simplifies the process of creating compressed archives. Basic 'zip' Syntax and Usage Navigate through the basic syntax and usage of the 'zip' command. We'll guide you through essential options and parameters to get you started. Creating Compressed Archives Discover how to create compressed archives of files and directories using 'zip'. Learn how to specify compression levels and preserve file attributes. Adding and Updating Files Dive into techniques for adding and updating files within existing 'zip' archives. Explore how to efficiently manage and modify your compressed data. Extracting Compressed Archives Uncover methods to extract files and directories from 'zip' archives. Learn how to restore your data to its original form while preserving its integrity. Compressing Multiple Files and Directories Explore strategies for compressing multiple files and directories at once using 'zip'. We'll guide you through efficient batch compression. Password Protection and Encryption Delve into the world of password protection and encryption with 'zip'. Learn how to secure your compressed archives with passwords. Practical 'zip' Examples Experience practical applications of the 'zip' command. We'll provide real-world examples and scenarios to showcase the versatility of 'zip'. Best Practices and Script Optimization Navigate through best practices for efficient 'zip' usage. Learn how to structure your 'zip' commands for readability, maintainability, and optimal performance. By the end of this guide, you'll be well-versed in leveraging the 'zip' command to compress, archive, and manage your data in Linux, enabling you to confidently handle your files and directories.

SORT command in LinuxUnix with examples | 'sort' com...
5K views · Aug 15, 2023 monibe.com
SORT command in LinuxUnix with examples Welcome to an illuminating tutorial on harnessing the capabilities of the 'sort' command in Linux/Unix. The 'sort' command is a versatile tool that empowers you to sort and arrange data lines in various ways. Join us as we delve into the world of 'sort' command usage, equipping you with the skills to efficiently organize and manipulate your data. Introduction to the 'sort' Command Begin by understanding the significance of the 'sort' command in data organization. Learn how 'sort' simplifies the process of arranging data lines alphabetically or numerically. Basic 'sort' Syntax and Usage Navigate through the basic syntax and usage of the 'sort' command. We'll guide you through essential options and parameters to get you started. Sorting Data Alphabetically and Numerically Discover how to sort data lines alphabetically and numerically using 'sort'. Learn how to specify sorting order and ignore case sensitivity. Sorting Files with Multiple Columns Dive into techniques for sorting files with multiple columns using 'sort'. Explore how to define primary and secondary sorting keys for complex arrangements. Customizing Sorting Behavior Uncover methods to customize the sorting behavior with 'sort'. Learn how to control fields, delimiters, and numeric comparisons for precise sorting. Reversing Sort Order and Output Explore strategies for reversing the sort order and output direction with 'sort'. We'll guide you through efficient ways to achieve descending sorting. Using 'sort' with Other Commands Delve into the world of combining the power of 'sort' with other commands. Learn how to create powerful data manipulation pipelines. Practical 'sort' Examples Experience practical applications of the 'sort' command. We'll provide real-world examples and scenarios to showcase the versatility of 'sort'. Best Practices and Script Optimization Navigate through best practices for efficient 'sort' usage. Learn how to structure your 'sort' commands for readability, maintainability, and optimal performance. By the end of this guide, you'll be well-equipped with the knowledge to effectively utilize the 'sort' command for arranging, organizing, and manipulating your data in Linux/Unix, enabling you to confidently handle and analyze your information.

tar command in Linux with examples | 'tar' command u...
17K views · Aug 15, 2023 monibe.com
tar command in Linux with examples Welcome to a comprehensive tutorial on harnessing the capabilities of the 'tar' command in Linux. The 'tar' command is a versatile tool that empowers you to create, extract, and manipulate compressed archive files. Join us as we delve into the world of 'tar' command usage, equipping you with the skills to efficiently archive, compress, and manage your data. Introduction to the 'tar' Command Begin by understanding the significance of the 'tar' command in data archiving and compression. Learn how 'tar' simplifies the process of bundling files and directories into a single archive. Basic 'tar' Syntax and Usage Navigate through the basic syntax and usage of the 'tar' command. We'll guide you through essential options and parameters to get you started. Creating Archive Files Discover how to create archive files using 'tar'. Learn how to bundle multiple files and directories into a single archive for efficient storage and transfer. Extracting Archive Files Dive into techniques for extracting data from 'tar' archives. Explore how to restore your files and directories to their original form while preserving their integrity. Compression and Decompression Uncover methods to compress and decompress 'tar' archives using various compression algorithms. Learn how to reduce the size of your archives for optimal storage and sharing. Working with Compression Formats Explore strategies for working with different compression formats, such as gzip and bzip2, with 'tar'. We'll guide you through choosing the right format for your needs. Combining 'tar' with Other Commands Delve into the world of combining the power of 'tar' with other commands. Learn how to create efficient data manipulation pipelines using 'tar'. Practical 'tar' Examples Experience practical applications of the 'tar' command. We'll provide real-world examples and scenarios to showcase the versatility of 'tar'. Best Practices and Script Optimization Navigate through best practices for efficient 'tar' usage. Learn how to structure your 'tar' commands for readability, maintainability, and optimal performance. By the end of this guide, you'll be well-versed in leveraging the 'tar' command to create, extract, and manage compressed archive files in Linux, enabling you to confidently handle and transfer your data.

TCP Server-Client implementation in C | TCP (Transmission Co...
45K views · Aug 15, 2023 monibe.com
TCP Server-Client Implementation in C Welcome to a comprehensive tutorial on creating a TCP Server-Client implementation in the C programming language. Networking forms the backbone of modern applications, and understanding how to establish communication between a server and multiple clients is essential. Join us as we dive into the world of network programming with C, equipping you with the skills to build a robust TCP Server-Client architecture. Introduction to TCP Server-Client Communication Begin by understanding the significance of TCP (Transmission Control Protocol) and its role in enabling reliable communication over networks. Learn how a TCP Server-Client architecture works and why it's crucial for various applications. Setting Up the Server and Client Navigate through the steps of setting up a TCP server and multiple clients in C. We'll guide you through initializing sockets, binding addresses, and preparing for communication. Establishing Connection and Communication Discover how to establish connections between the server and clients using sockets. Learn how to send and receive data seamlessly, ensuring smooth communication. Handling Multiple Clients Dive into techniques for handling multiple client connections efficiently. Explore concepts like multi-threading and asynchronous communication to ensure optimal performance. Data Exchange and Error Handling Uncover methods for exchanging data between the server and clients. Learn how to handle errors gracefully, ensuring the stability of your application. Practical Implementation Examples Experience practical applications of the TCP Server-Client architecture. We'll provide real-world examples and scenarios to showcase the versatility and power of network programming in C. Security and Encryption Explore strategies for enhancing the security of your TCP Server-Client communication. Learn about encryption, authentication, and best practices for secure network programming. Optimization and Scalability Navigate through optimization techniques to enhance the performance and scalability of your TCP Server-Client application. Learn how to handle large numbers of clients efficiently. Debugging and Troubleshooting Delve into the world of debugging and troubleshooting network-related issues. We'll guide you through diagnosing and resolving common problems. By the end of this guide, you'll be well-equipped with the knowledge to confidently build and deploy a TCP Server-Client implementation in C, enabling you to establish seamless network communication in your applications.

curl command in Linux with Examples | capabilities of the &#...
21K views · Aug 15, 2023 monibe.com
curl command in Linux with Examples Welcome to a comprehensive tutorial on harnessing the capabilities of the 'curl' command in Linux. The 'curl' command is a versatile tool that empowers you to transfer data to and from remote servers using various protocols. Join us as we delve into the world of 'curl' command usage, equipping you with the skills to efficiently retrieve and send data over the internet. Introduction to the 'curl' Command Begin by understanding the significance of the 'curl' command in data transfer and manipulation. Learn how 'curl' simplifies the process of making HTTP requests, downloading files, and interacting with APIs. Basic 'curl' Syntax and Usage Navigate through the basic syntax and usage of the 'curl' command. We'll guide you through essential options and parameters to get you started. Making HTTP Requests Discover how to make HTTP requests using 'curl'. Learn how to retrieve web pages, send data, and interact with web services effortlessly. Downloading Files and Resources Dive into techniques for downloading files and resources from the internet using 'curl'. Explore how to save images, documents, and other content with a single command. Uploading Data and Content Uncover methods to upload data and content to remote servers using 'curl'. Learn how to send files, JSON data, and other payloads to APIs and web services. Authentication and Security Explore strategies for handling authentication and security with 'curl'. Learn how to pass credentials, tokens, and cookies for secure data exchange. Custom Headers and Parameters Delve into the world of custom headers and parameters with 'curl'. We'll guide you through tailoring your requests for specific scenarios. Practical 'curl' Examples Experience practical applications of the 'curl' command. We'll provide real-world examples and scenarios to showcase the versatility of 'curl'. Data Manipulation and Transformation Navigate through techniques for manipulating and transforming data using 'curl'. Learn how to process and modify data on the fly. Scripting and Automation Unleash the power of 'curl' for scripting and automation. Explore how to integrate 'curl' commands into your scripts for seamless data operations. By the end of this guide, you'll be well-versed in leveraging the 'curl' command to transfer, retrieve, and manipulate data over the internet in Linux, enabling you to confidently handle various data-related tasks.

linux operating system list | Linux operating system
968 views · Aug 17, 2023 monibe.com
Linux operating system list Welcome to a comprehensive guide to the diverse world of Linux operating systems. Linux offers a plethora of options, each tailored to different needs and preferences. Join us as we embark on a journey to explore and categorize the various Linux distributions available, helping you discover the right fit for your computing requirements. Introduction to Linux Operating Systems Begin by understanding the significance of Linux as an open-source and highly customizable operating system. Learn about the principles that guide the development of various Linux distributions. Categorizing Linux Distributions Dive into the world of Linux distributions and discover how they are categorized based on their purpose, user experience, and technical features. List of Linux Distributions Explore an extensive list of Linux distributions, ranging from popular ones like Ubuntu, Debian, and Fedora to specialized distributions designed for specific tasks or environments. Desktop and User-Friendly Distributions Uncover user-friendly Linux distributions tailored for desktop users. We'll explore their features, interfaces, and ease of use. Server and Enterprise Distributions Navigate through Linux distributions optimized for server environments and enterprise use. Learn about their robustness, security features, and scalability. Specialized Distributions Discover specialized Linux distributions for unique purposes, such as penetration testing, multimedia production, scientific research, and more. Command-Line and Minimalist Distributions Explore lightweight and command-line-oriented Linux distributions. Learn about their efficiency, minimal resource requirements, and use cases. Choosing the Right Distribution Dive into factors to consider when choosing a Linux distribution, including hardware compatibility, software availability, community support, and personal preferences. Installation and Getting Started Get started with installing your chosen Linux distribution. We'll provide an overview of the installation process and initial configuration steps. Practical Usage and Applications Experience practical applications of different Linux distributions. We'll showcase scenarios where specific distributions excel and provide insights into their usage. By the end of this guide, you'll have a comprehensive understanding of the various Linux operating systems available, enabling you to make informed decisions and explore the world of Linux with confidence.

linux foundation subsidiaries | Ecosystem of the Linux Found...
129 views · Aug 17, 2023 monibe.com
Linux Foundation subsidiaries Welcome to an insightful exploration of the Linux Foundation and its extensive network of subsidiaries. The Linux Foundation plays a pivotal role in advancing open-source technologies and collaboration within the software industry. Join us as we delve into the structure, purpose, and impactful initiatives of the Linux Foundation and its affiliated organizations. Introduction to the Linux Foundation Begin by understanding the mission and significance of the Linux Foundation as a driving force behind the open-source software movement. Learn about its role in fostering innovation, collaboration, and community engagement. The Linux Foundation's Subsidiaries Dive into the ecosystem of the Linux Foundation's subsidiaries, each contributing to specific domains and technologies within the open-source realm. Cloud Native Computing Foundation (CNCF) Explore the CNCF, a prominent subsidiary of the Linux Foundation dedicated to cloud-native technologies and the Kubernetes ecosystem. Discover its initiatives and impact on modern application development. Open Networking Foundation (ONF) Navigate through the ONF, a subsidiary focused on transforming networking through open-source initiatives. Learn about its contributions to software-defined networking (SDN) and network functions virtualization (NFV). Automotive Grade Linux (AGL) Uncover the AGL project, an innovative subsidiary driving open-source solutions for the automotive industry. Explore its efforts to create a standardized software platform for connected cars. EdgeX Foundry Discover EdgeX Foundry, a collaborative project aimed at building a framework for edge computing. Learn how this subsidiary addresses the challenges of IoT and edge device management. Hyperledger Delve into Hyperledger, a collection of open-source blockchain projects hosted by the Linux Foundation. Explore its role in advancing blockchain technology for business applications. Continuous Delivery Foundation (CDF) Navigate through CDF, a subsidiary dedicated to promoting best practices and tools for continuous delivery and DevOps automation. OpenJS Foundation Explore the OpenJS Foundation, fostering the growth of JavaScript and web technologies through collaboration and community-driven initiatives. Practical Impact and Collaboration Experience practical examples of how the Linux Foundation and its subsidiaries drive innovation, industry standards, and open-source development across various sectors. Contributing and Engaging with the Linux Foundation Learn how you can get involved, contribute, and engage with the Linux Foundation and its subsidiaries to shape the future of open-source technologies. By the end of this guide, you'll have a comprehensive understanding of the Linux Foundation's subsidiaries and their collective efforts to empower the open-source community, drive technological advancements, and shape the digital landscape.

is linux an operating system or a kernel | Linux is an opera...
3K views · Aug 17, 2023 monibe.com
is Linux an operating system or a kernel Welcome to a clarifying exploration of the Linux ecosystem? Many have wondered whether Linux is an operating system in itself or simply a kernel. Join us as we dissect the components of Linux and unravel its true nature, shedding light on its role in modern computing. Understanding the Linux Kernel Begin by delving into the foundational element of Linux: the kernel. Learn about its crucial role in managing hardware resources, providing essential services, and acting as an interface between software and hardware. Linux as an Operating System Explore the broader context of Linux as an operating system. Discover how the kernel, combined with various software components and utilities, forms a complete operating environment that users interact with. The Linux Distributions Navigate through the concept of Linux distributions, where the Linux kernel is packaged along with a range of software, tools, and applications to create a functional and user-friendly operating system. Components of a Linux Distribution Uncover the components that complement the Linux kernel within a distribution, including the shell, user interface, libraries, utilities, and applications. Differentiating Linux Distributions Dive into the diversity of Linux distributions, each tailored to specific use cases, preferences, and user experiences. Learn about popular distributions like Ubuntu, Fedora, Debian, and more. Kernel vs. Operating System Delve into the nuanced differences between the Linux kernel and a complete Linux operating system. Understand how the kernel interacts with the broader software stack to create a functional environment. Practical Implications Experience the practical implications of whether Linux is perceived as an operating system or a kernel. Gain insights into the impact on software development, compatibility, and customization. Real-world Examples Explore real-world examples and scenarios that showcase the role of Linux as both a kernel and an operating system, highlighting its versatility and adaptability. Conclusion and Takeaways By the end of this exploration, you'll have a clear understanding of whether Linux is an operating system or a kernel, and how this distinction influences its usage and functionality.

what is linux programming | Programming Languages on Linux
9K views · Aug 17, 2023 monibe.com
what is linux programming Welcome to an enlightening journey into the world of Linux programming? In this comprehensive guide, we'll unravel the intricacies of Linux programming, exploring its principles, tools, languages, and applications. Whether you're a novice or an experienced programmer, join us as we dive into the heart of Linux programming and its role in modern software development. Introduction to Linux Programming Begin by understanding the fundamental concepts of Linux programming. Explore how Linux serves as a versatile platform for developing a wide range of applications and software solutions. Programming Languages on Linux Dive into the array of programming languages compatible with Linux, including C, C++, Python, Java, and more. Learn how these languages are used to create various software applications, from system utilities to web applications. Linux Development Tools Navigate through the essential development tools available on Linux, such as compilers, integrated development environments (IDEs), text editors, version control systems, and debugging tools. Linux System Calls and APIs Uncover the role of system calls and application programming interfaces (APIs) in Linux programming. Explore how these interfaces facilitate interaction between software applications and the Linux kernel. Application Development on Linux Explore the process of developing applications on Linux. Learn about building graphical user interfaces (GUIs), creating command-line utilities, and leveraging open-source libraries. Kernel Programming and Module Development Dive into the realm of kernel programming and module development. Understand how to interact with the Linux kernel, develop kernel modules, and extend the functionality of the operating system. Networking and Web Development Discover the world of networking and web development on Linux. Learn about creating networked applications, web servers, and web applications using Linux-based tools and technologies. Security and Performance Considerations Delve into security and performance considerations when programming on Linux. Explore best practices for writing secure code, optimizing performance, and ensuring software reliability. Real-world Applications and Case Studies Experience real-world examples and case studies that showcase the versatility and power of Linux programming. From embedded systems to cloud applications, explore how Linux is used in various domains. Conclusion and Beyond By the end of this guide, you'll have a comprehensive understanding of Linux programming and its significance in modern software development. Whether you're interested in system-level programming, application development, or web programming, Linux offers a rich and dynamic environment to explore.

what is an example of a linux device | Linux powered devices
2K views · Aug 17, 2023 monibe.com
what is an example of a Linux device Welcome to an illuminating exploration of Linux devices? In this informative guide, we'll delve into the world of Linux-powered devices, uncovering examples and insights that showcase the versatility and impact of Linux in various hardware applications. Join us as we take a closer look at how Linux is seamlessly integrated into devices that enhance our daily lives. Introduction to Linux Devices Begin by understanding the role of Linux in powering a diverse range of devices. Learn how the Linux operating system serves as the foundation for numerous hardware applications. Embedded Systems and IoT Devices Dive into the realm of embedded systems and Internet of Things (IoT) devices. Explore how Linux is utilized to create smart appliances, wearable gadgets, home automation systems, and more. Smartphones and Tablets Discover how Linux plays a crucial role in the development of smartphones and tablets. Explore examples of popular mobile operating systems that rely on the Linux kernel. Home Entertainment and Media Devices Navigate through the world of home entertainment and media devices powered by Linux. Learn about Linux-based smart TVs, streaming devices, media centers, and digital signage solutions. Network Devices and Routers Uncover the role of Linux in network devices and routers. Explore how Linux powers networking equipment, enabling seamless data communication and internet connectivity. Industrial Control Systems Explore the use of Linux in industrial control systems and automation. Learn about Linux-based devices used in manufacturing, robotics, and industrial processes. Automotive and Transportation Dive into the automotive and transportation sector, where Linux is integrated into vehicles for various purposes, including infotainment systems, navigation, and driver assistance. Healthcare and Medical Devices Discover how Linux contributes to healthcare and medical devices. Explore examples of Linux-powered medical equipment, imaging systems, and diagnostic tools. Gaming Consoles and Handheld Devices Navigate through the world of gaming consoles and handheld devices. Learn about Linux-based gaming platforms and handheld consoles that offer a unique gaming experience. Practical Applications and Impact Experience real-world examples and case studies that highlight the practical applications and impact of Linux devices across different industries. Conclusion and Future Outlook By the end of this guide, you'll have gained valuable insights into the diverse range of Linux-powered devices and their significance in shaping our modern technological landscape.

linux foundation certification | Linux Foundation certificat...
2K views · Aug 17, 2023 monibe.com
Linux foundation certification Welcome to a journey of professional growth and excellence through Linux Foundation certifications. In this comprehensive guide, we'll delve into the world of Linux Foundation certification programs, exploring their benefits, offerings, and how they can elevate your career in the dynamic realm of open-source technology. Introduction to Linux Foundation Certifications Embark on a quest for knowledge and recognition with Linux Foundation certifications. Discover how these certifications are designed to validate your skills, enhance your expertise, and open doors to exciting career opportunities. Wide Range of Certification Tracks Explore the diverse array of certification tracks offered by the Linux Foundation. From Linux systems and cloud technologies to open-source leadership and networking, find the track that aligns with your interests and goals. Benefits of Linux Foundation Certifications Uncover the myriad benefits of earning a Linux Foundation certification. Learn how these credentials can boost your credibility, increase your earning potential, and provide a competitive edge in the tech industry. Certification Exams and Preparation Navigate through the certification exam process and discover valuable tips for effective preparation. Explore study resources, practice exams, and strategies to ensure your success on exam day. Industry Recognition and Networking Dive into the world of industry recognition that comes with Linux Foundation certifications. Explore how these certifications are recognized by top companies, recruiters, and peers in the tech community. Real-world Success Stories Experience inspiring success stories from individuals who have transformed their careers through Linux Foundation certifications. Learn how these certifications have propelled professionals to new heights in their careers. Certification Renewal and Continued Learning Understand the importance of certification renewal and the concept of continued learning. Explore how staying updated with the latest technologies ensures the longevity of your certification and expertise. Conclusion and Your Next Step By the end of this guide, you'll be equipped with the knowledge to embark on your certification journey with the Linux Foundation. Whether you're an aspiring IT professional or a seasoned expert, Linux Foundation certifications are your pathway to excellence.

How to Install Ubuntu 22.04 LTS | Installation Ubuntu 22.04 ...
20K views · Aug 19, 2023 monibe.com
How to Install Ubuntu 22.04 LTS Welcome to an in-depth tutorial that walks you through the process of installing Ubuntu 22.04 LTS, the latest long-term support version of this popular Linux distribution. In this comprehensive video, we'll provide you with clear, step-by-step instructions to ensure a smooth installation experience, even if you're new to the world of Linux. Join us as we demystify the process and empower you to set up Ubuntu on your system like a pro. Preparing for Installation Begin by understanding the system requirements for Ubuntu 22.04 LTS. We'll guide you through the hardware and software prerequisites, ensuring your system is ready for the installation process. Creating a Bootable USB Drive Learn how to create a bootable USB drive containing the Ubuntu 22.04 LTS installation files. Follow our detailed instructions using popular tools, such as Etcher or Rufus, to prepare the bootable drive. Configuring BIOS Settings Navigate your system's BIOS settings to ensure the correct boot order. We'll walk you through accessing your BIOS and changing settings to enable booting from the USB drive. Starting the Installation Process Boot your computer from the bootable USB drive and enter the Ubuntu installer. Follow our step-by-step instructions for selecting installation options, including language preferences and keyboard settings. Partitioning Your Drive Understand the process of partitioning your hard drive for Ubuntu installation. Learn about different partitioning options, such as creating a separate root partition and a swap partition. Setting User and System Information Enter essential information, including your timezone, keyboard layout, and user account details. Ensure a secure and personalized setup for your Ubuntu environment. Selecting Software and Packages Explore software and package options to customize your Ubuntu installation. We'll guide you through choosing the desktop environment, software applications, and additional packages. Completing the Installation Sit back as we guide you through the final stages of the installation process. Watch as Ubuntu 22.04 LTS is installed on your system, with progress updates and helpful tips along the way. First Boot and Initial Setup Experience the excitement of booting into your newly installed Ubuntu system for the first time. Follow the initial setup process, including network configuration and user login. Exploring Your New Ubuntu System Get acquainted with your Ubuntu environment. We'll highlight key features and functionalities, helping you feel confident and comfortable navigating through the interface.

The Ultimate Guide to the Linux Terminal | Linux Terminal Ba...
3K views · Aug 19, 2023 monibe.com
The Ultimate Guide to the Linux Terminal Welcome to an exhaustive guide that unveils the secrets of the Linux terminal, helping you conquer its intricacies and become a command-line guru. In this comprehensive video, we embark on a journey through the Linux terminal, from the essentials to the advanced techniques that elevate your proficiency. Whether you're a newcomer or a seasoned user, join us as we unravel the terminal's capabilities and equip you with the skills to navigate, manage, and command your Linux environment like a pro. Introduction to the Linux Terminal Set the stage with an introduction to the Linux terminal. Discover its role, importance, and the invaluable benefits of mastering its command-line interface. Getting Started: Terminal Basics Begin your journey by understanding the fundamentals of the terminal. Learn how to launch it, navigate directories, and execute basic commands that form the building blocks of your terminal expertise. File and Directory Mastery Explore the art of file and directory manipulation within the terminal. Master the commands for creating, moving, copying, and deleting files and directories, streamlining your workflow. Text Editing and Manipulation Unlock the power of text manipulation in the terminal. Delve into text editors like 'nano' and 'vim,' gaining the ability to craft, edit, and manage text files seamlessly. Mastery of Permissions and Ownership Navigate the complex realm of file permissions and ownership. Gain a comprehensive understanding of 'chmod,' 'chown,' and related commands to secure your files and manage access. Piping and Redirection Techniques Harness the potential of piping and redirection. Learn how to combine commands and direct input and output, enabling you to perform intricate operations with ease. Advanced Terminal Techniques Elevate your terminal prowess with advanced tricks. Dive into command history, aliases, and scripting, empowering you to automate tasks and boost your efficiency. System Navigation Beyond Boundaries Expand your horizons by navigating remote systems. Discover commands that enable you to explore networks, access distant machines, and even transfer files, all from the terminal. Tailoring Your Terminal Environment Personalize your terminal environment to match your preferences. Learn how to tweak appearance, colors, and behavior, transforming the terminal into your ideal workspace. Troubleshooting and Expert Insights Navigate challenges with confidence using troubleshooting techniques. Unlock expert insights and practical tips to overcome obstacles and optimize your terminal experience.

How to Use Docker for Beginners | Installing Docker
14K views · Aug 19, 2023 monibe.com
How to Use Docker for Beginners Welcome to an enlightening journey into the world of Docker, the revolutionary containerization platform. In this comprehensive video, we demystify Docker for beginners, taking you from the basics to practical applications. Whether you're new to virtualization or curious about container technology, join us as we unravel Docker's magic and equip you with the skills to harness its potential. Introduction to Docker Start with an introduction to Docker's world-changing concept. Understand containerization, why Docker is a game-changer, and how it accelerates application deployment. Installing Docker Begin your Docker journey by installing the platform on your machine. We'll guide you through the installation process on various platforms, ensuring you're ready to dive in. Creating and Running Containers Learn how to create and run containers in Docker. We'll explore essential commands that let you encapsulate applications, ensuring consistency across different environments. Working with Images Discover Docker images, the building blocks of containers. Understand how to create, pull, and push images to Docker Hub, sharing your creations with the world. Networking and Linking Containers Explore networking in Docker. Learn how to link containers, enabling seamless communication between them, and how to manage networking configurations. Managing Volumes Master data persistence using Docker volumes. Discover how to manage data between containers and the host system, ensuring data integrity across restarts. Docker Compose for Orchestration Delve into Docker Compose, a powerful tool for managing multi-container applications. Learn how to define and orchestrate complex applications effortlessly. Scaling with Docker Swarm Uncover the art of scaling applications using Docker Swarm. Understand how to deploy services across a cluster of machines, ensuring high availability. Docker Best Practices Embrace Docker best practices for optimal results. From efficient image creation to container security, we'll guide you through industry-recommended approaches.

How to Set Up a Home Server | Setting Up Home Servers
3K views · Aug 19, 2023 monibe.com
How to Set Up a Home Server Welcome to an in-depth tutorial that walks you through the process of setting up your very own home server. In this video, we'll cover everything you need to know to create a versatile and powerful server environment right at home. Whether you're a tech enthusiast or just curious about the possibilities, join us as we break down each step, from hardware selection to service configuration. Introduction to Home Servers Begin by understanding the concept of home servers and their benefits. Learn how a home server can enhance your digital life by providing storage, streaming, and more. Choosing the Right Hardware Explore the hardware options available for building your home server. We'll guide you through selecting components that match your needs, budget, and future expansion plans. Selecting the Operating System Discover various operating systems suitable for home servers. Whether you prefer Linux or Windows, we'll help you choose the right OS for your server's purpose. Installing and Configuring the OS Get hands-on with installing and configuring the chosen operating system. Follow along as we guide you through the installation process, setting up network configurations, and more. Setting Up Essential Services Learn how to set up essential services that make your home server useful. We'll cover file sharing, media streaming, remote access, and more, transforming your server into a versatile hub. Centralized Storage Solutions Unlock the power of centralized storage with your home server. Explore the setup of network-attached storage (NAS), allowing you to access your files from anywhere. Running Your Own Services Dive into the world of running your own applications on the home server. From hosting websites to managing databases, we'll show you how to set up and manage various services. Security and Backups Prioritize security by implementing best practices. We'll guide you through setting up firewalls, securing remote access, and implementing backup strategies to safeguard your data. Remote Access and Monitoring Discover how to access and monitor your home server remotely. Learn about remote desktop solutions and monitoring tools that keep you informed about your server's health. Exploring Advanced Possibilities Explore advanced topics such as virtualization, containerization, and setting up a home lab for testing and development purposes.
How to Use the Linux File System | Linux File System & D...
14K views · Aug 19, 2023 monibe.com
How to Use the Linux File System Welcome to a comprehensive tutorial that takes you on a journey through the intricate world of the Linux file system. In this video, we'll unravel the complexities of the Linux directory structure, file management, permissions, and more. Whether you're a beginner or looking to deepen your Linux knowledge, join us as we navigate the Linux file system landscape, empowering you to confidently interact with your system's files and directories. Introduction to the Linux File System Start with an overview of the Linux file system hierarchy. Understand the organization of directories, files, and their roles within the system. Navigating the File System Learn essential commands to navigate the Linux file system. Discover how to traverse directories, list contents, and move between different locations. File Management Explore fundamental file management operations. From creating and deleting files to copying and moving them, we'll guide you through the process. Working with Directories Understand how to create, rename, and delete directories. Learn about nested directories and how they contribute to organizing your files efficiently. File Permissions and Ownership Dive into the world of file permissions and ownership. Master the chmod and chown commands, ensuring you have full control over your files. Viewing and Editing Files Discover various commands to view and edit files directly in the terminal. We'll cover basic text editors and command-line utilities. Searching for Files Learn how to locate files using the find command and explore its advanced options for precise searches. Archiving and Compression Explore archiving and compression techniques. Understand how to create and extract compressed files using tar and gzip.

How to Use Pipes and Redirection in Linux | pipes and redire...
11K views · Aug 19, 2023 monibe.com
How to Use Pipes and Redirection in Linux Welcome to a comprehensive tutorial that delves into the power of pipes and redirection in Linux. In this video, we'll uncover the techniques that allow you to seamlessly manipulate, redirect, and combine the output of commands to enhance your workflow. Whether you're a Linux beginner or seeking to streamline your command-line skills, join us as we demystify the concepts of pipes and redirection, enabling you to harness their potential for efficient data manipulation. Introduction to Pipes and Redirection Begin by understanding the core concepts of pipes and redirection. Learn how these tools can transform the way you interact with the Linux terminal. Using Pipes to Chain Commands Discover how to use pipes to connect multiple commands. Witness how the output of one command seamlessly becomes the input of another. Redirecting Output Explore different techniques for redirecting output. Learn how to send command output to files, creating logs or saving data for future use. Appending Output to Files Master the art of appending output to existing files. This technique proves invaluable for maintaining comprehensive logs and records. Redirecting Input Unlock the ability to redirect input from files or even other commands. Witness how redirection can streamline complex tasks. Combining Redirection and Pipes Take your skills to the next level by combining pipes and redirection. Witness the synergy between these tools in enhancing data manipulation.

How to Use the Watch Command in Linux | 'watch' comm...
8K views · Aug 19, 2023 monibe.com
How to Use the Watch Command in Linux Welcome to an enlightening tutorial that introduces you to the power of the 'watch' command in Linux. In this video, we'll explore how this command can revolutionize the way you monitor processes, commands, and system activities in real time. Whether you're a Linux novice or seeking to optimize your system management skills, join us as we uncover the capabilities of the 'watch' command, allowing you to stay informed and proactive. Introduction to the 'watch' Command Begin by understanding the core purpose of the 'watch' command. Discover how it empowers you to observe command output and changes dynamically. Real-Time Monitoring Experience the magic of real-time monitoring. Learn how to use the 'watch' command to keep a continuous eye on processes, logs, and system behavior. Customizing Refresh Intervals Master the ability to customize the refresh interval of the 'watch' command. Explore how adjusting timing can optimize your monitoring experience. Using Filters and Pipelines Discover advanced techniques by combining 'watch' with filters and pipelines. Witness how you can focus on specific data points within command output. Applying 'watch' with Command Options Explore command-specific options that enhance the 'watch' command's capabilities. Witness how these options provide valuable insights into your system.

How to Install and Use VirtualBox on Linux | Installing Virt...
11K views · Aug 19, 2023 monibe.com
How to Install and Use VirtualBox on Linux Welcome to an enlightening tutorial that guides you through the process of installing and harnessing the potential of VirtualBox on Linux. In this video, we'll walk you through the steps to set up this powerful virtualization software, enabling you to create and manage virtual machines effortlessly. Whether you're a Linux enthusiast or new to virtualization, join us as we dive into the world of VirtualBox, expanding your computing possibilities. Introduction to VirtualBox on Linux Begin with an introduction to VirtualBox and its significance in the world of virtualization. Understand how it empowers you to run multiple operating systems on a single machine. Installing VirtualBox Learn how to install VirtualBox on your Linux system. We'll guide you through the process, ensuring a smooth setup. Creating a Virtual Machine Explore the creation of virtual machines using VirtualBox. Understand how to allocate resources and customize settings to match your requirements. Installing Guest Operating Systems Discover how to install guest operating systems within your virtual machines. Witness the versatility of running various OSes seamlessly. Managing Virtual Machines Master the art of managing your virtual machines. Learn how to start, pause, save, and delete VMs within VirtualBox. Taking Snapshots and Cloning Unlock the power of snapshots and cloning in VirtualBox. Understand how these features enhance your virtualization experience. Using VirtualBox Extensions Explore VirtualBox extensions that enhance functionality. Learn how to install and utilize these extensions for improved performance.

How to Install and Use VMware on Linux | Process of installi...
16K views · Aug 20, 2023 monibe.com
How to Install and Use VMware on Linux, Welcome to an illuminating tutorial that demystifies the process of installing and leveraging VMware on Linux. In this video, we'll guide you through the steps to set up VMware, a robust virtualization platform, that empowers you to create, manage, and run multiple operating systems on a single machine. Whether you're a Linux aficionado or a newcomer to virtualization, join us as we embark on a journey to unlock the world of VMware, expanding your computing horizons. Introduction to VMware on Linux Begin by understanding the importance of VMware in the virtualization landscape. Discover how it enables you to create virtual environments for various operating systems. Here, we will see how to install and run the VMware Tools in the Ubuntu Linux system. Virtualization means you can use the guest operating system on your main operating system. Sometimes they help you to do some tasks that are not performable to your current operating system, so you also use a virtual operating system, with the help of VMWare. Prerequisite: At Least 2Gb Ram (Recommended) 20Gb of space in Hard Drive (Recommended) Installing VMware on Linux Learn how to install VMware on your Linux system. We'll walk you through the installation process, ensuring a seamless setup. Creating Virtual Machines Dive into the creation of virtual machines using VMware. Understand how to allocate resources and customize settings to suit your needs. Installing Guest Operating Systems Explore the installation of guest operating systems within your virtual machines. Witness the flexibility of running diverse OSes side by side. Managing Virtual Machines Master the art of efficiently managing your virtual machines in VMware. Learn how to start, stop, suspend, and delete VMs with ease. Utilizing Snapshots and Cloning Unlock the power of snapshots and cloning in VMware. Witness how these features streamline your virtualization experience. Enhancing Performance with VMware Tools Discover VMware Tools, a set of utilities that enhance VM performance. Learn how to install and utilize these tools effectively. https://www.vmware.com/in.html

How to Install and Use WSL on Windows | Install WSL command
8K views · Aug 20, 2023 monibe.com
How to Install and Use WSL on Windows the process of installing and harnessing the power of Windows Subsystem for Linux (WSL). In this video, we'll walk you through the steps to set up WSL, enabling you to seamlessly run a Linux distribution alongside your Windows environment. Whether you're a Windows user curious about Linux or looking to enhance your development capabilities, join us as we explore the world of WSL, bridging the gap between two powerful operating systems. Introduction to WSL Begin by understanding the significance of Windows Subsystem for Linux. Discover how it allows you to enjoy the benefits of Linux on your Windows machine. Install WSL command You can now install everything you need to run WSL with a single command. Open PowerShell or Windows Command Prompt in administrator mode by right-clicking and selecting "Run as administrator", enter the wsl --install command, then restart your machine. PowerShell Copy wsl --install This command will enable the features necessary to run WSL and install the Ubuntu distribution of Linux. Installing WSL Learn how to install WSL on your Windows system. We'll guide you through the installation process, ensuring a smooth setup. Choosing a Linux Distribution Explore the available Linux distributions and choose the one that best suits your needs. Learn how to download and install your preferred distribution. Running Linux Commands in WSL Dive into the world of WSL by running Linux commands seamlessly within your Windows environment. Experience the harmony of two operating systems. Accessing Linux Files from Windows Discover how to access and manipulate Linux files from your Windows interface. Witness the synergy between WSL and your existing Windows tools. Integrating Development Workflows Explore how WSL enhances your development workflow. Learn how to install programming languages, tools, and packages with ease.

How to Use Puppet with Linux | Installing Puppet | Creating ...
3K views · Aug 20, 2023 monibe.com
Installing Puppet agent: Linux Install the Puppet agent so that your master can communicate with your Linux nodes. Before you begin: Review the pre-install tasks and installing Puppet Server. Install a release package to enable Puppet Platform repositories. Confirm that you can run Puppet executables. The location for Puppet’s executables is /opt/puppetlabs/bin/, which is not in your PATH environment variable by default. The executable path doesn’t matter for Puppet services — for instance, service puppet start works regardless of the PATH — but if you’re running interactive puppet commands, you must either add their location to your PATH or execute them using their full path. To quickly add the executable location to your PATH for your current terminal session, use the command export PATH=/opt/puppetlabs/bin:$PATH. You can also add this location wherever you configure your PATH, such as your .profile or .bashrc configuration files. For more information, see details about file and directory locations. Install the puppet-agent package on your Puppet agent nodes using the command appropriate to your system: Yum – sudo yum install puppet-agent Apt – sudo apt-get install puppet-agent Zypper – sudo zypper install puppet-agent (Optional) Configure agent settings. For example, if your master isn’t reachable at the default address, server = puppet, set the server setting to your Puppet master’s hostname with the following command: puppet config set server <MASTER FDQN> --section main. For other settings you might want to change, see a list of agent-related settings. Start the puppet service: sudo /opt/puppetlabs/bin/puppet resource service puppet ensure=running enable=true. (Optional) To see a sample of Puppet agent’s output and verify any changes you may have made to your configuration settings in step 5, manually launch and watch a Puppet run: sudo /opt/puppetlabs/bin/puppet agent --test Sign certificates on the certificate authority (CA) master. On the Puppet master: Run sudo /opt/puppetlabs/bin/puppet cert list to see any outstanding requests. Run sudo /opt/puppetlabs/bin/puppet cert sign <NAME> to sign a request. As each Puppet agent runs for the first time, it submits a certificate signing request (CSR) to the CA Puppet master. You must log into that server to check for and sign certificates. After an agent’s certificate is signed, it regularly fetches and applies configuration catalogs from the Puppet master.

How to Use Chef with Linux | chef-repo directory | Chef with...
2K views · Aug 20, 2023 monibe.com
How to Use Chef with Linux, Go to your Workstation terminal and download the Chef DK by using wget command and paste the link. Execute this: wget https://packages.chef.io/stable/el/6/chefdk-1.0.3-1.el6.x86_64.rpm Download Chef DK - Chef Tutorial - Edureka The package is now downloaded. It is time to install this package using rpm. Execute this: rpm -ivh chefdk-1.0.3-1.el6.x86_64.rpm Install Chef DK - Chef Tutorial - Edureka Chef DK is now installed in my Workstation. Step 2: Create a Recipe in the Workstation Let us start by creating a Recipe in the Workstation and test it locally to ensure it is working. Create a folder named chef-repo. We can create our Recipes inside this folder. Execute this: Course Curriculum DevOps Certification Training Course mkdir chef-repo cd chef-repo chef-repo - Chef Tutorial - Edureka In this chef-repo directory I will create a Recipe named edureka.rb. .rb is the extension used for ruby. I will use vim editor, you can use any other editor that you want like gedit, emac, vi etc. Execute this: vim edureka.rb Here add the following: file '/etc/motd' content 'Welcome to Chef' end Recipe Content - Chef Tutorial - Edureka This Recipe edureka.rb creates a file named /etc/motd with content “Welcome to Chef”. Now I will use this Recipe to check if it is working. Execute this: chef-apply edureka.rb Apply Motd Recipe - Chef Tutorial - Edureka So there is a file created in the chef-repo that has content Welcome to Chef. Step 3: Modifying Recipe file to install httpd package I will modify the Recipe to install httpd package on my Workstation and copy an index.html file to the default document root to confirm the installation. The default action for a package resource is installation, hence I don’t need to specify that action separately. Execute this: vim edureka.rb Over here add the following: package 'httpd' service 'httpd' do action [:enable, :start] end file '/var/www/html/index.html' do content 'Welcome to Apache in Chef' end HTTPD Package Recipe - Chef Tutorial - Edureka Now I will apply these configurations by executing the below command: Execute this: chef-apply edureka.rb Apply httpd Recipe - Chef Tutorial - Edureka The command execution clearly describes each instance in the Recipe. It installs the Apache package, enables and starts the httpd service on the Workstation. And it creates an index.html file in the default document root with the content “Welcome to Apache in Chef”. Now confirm the installation of Apache2 by opening your web-browser. Type your public IP address or the name of your host. In my case, it is localhost. Confirm Installation - Chef Tutorial - Edureka Step 4: Now we will create our first Cookbook. Create a directory called cookbooks, and execute the below command to generate the Cookbook. Execute this: mkdir cookbooks cd cookbooks chef generate cookbook httpd_deploy httpd_deploy is a name given to the Cookbook. You can give any name that you want. Creating Chef Cookbooks - Chef Tutorial - Edureka Let us move to this new directory httpd_deploy.

How to Use Terraform with Linux | How to install Terraform o...
6K views · Aug 20, 2023 monibe.com
How to Use Terraform with Linux, How to install Terraform on a Linux Virtual Server Instance in IBM Cloud The installation has four main components: Install the Terraform executable Install the IBM Cloud Plugin Install the IBM Cloud Command Line Interface (or CLI) Install the IBM Cloud CLI VPC Plugin Prerequisite Create a Linux Virtual Server Instance (VSI) to use as our system that we want to install Terraform. The advantage of using the VSI as your system to perform Terraform work is that you do not need to install products onto your local machine. Moreover, you can share the VSI with peers who need to do Terraform work without forcing them to install Terraform on their local machines. Lastly, the VSI we will create will cost pennies a day to own in IBM Cloud. Log into your IBM Cloud account and provision a new VSI with the following specifications: Balanced Profile with 2vCPUs and 4GB RAM Centos 7.x Operating System

How to Use the Nano Text Editor in Linux | Installing Nano T...
1K views · Aug 20, 2023 monibe.com
How to Use the Nano Text Editor in Linux Nano is a user-friendly, simple and WYSIWYG(What You See Is What You Get) text editor, which improves the features and user-friendliness of UW Pico text editor. Unlike vim editor or any other command-line editor, it doesn’t have any mode. It has an easy GUI(Graphical User Interface) which allows users to interact directly with the text in spite of switching between the modes as in vim editor. Installing Nano Text Editor Nano is generally by default available in many Linux distributions but in case, it is not installed you may install the same using the following commands. $sudo apt update In case of Debian/Ubuntu $sudo apt install nano In case of CentOS/Fedora $yum install nano Working with Nano Text Editor 1. To create and open a new file. $nano new_filename creating and opening a new file in nano text editor The above command will open a new file with new_filename as shown in the output. In case the file already exists it will open the same and in case the file is not there in the current directory it will create a new one. At the bottom of the window, there is a list of shortcut keys for nano. 2. To save a file press Ctrl+o It will ask you for the filename. In case, you want to save the changes to a new file or want to create a new file then change the name else keep the name same. saving a text file in nano text editor As soon as you will press enter key, then In case, you have changed the name of the file then it will save the file with a new name and if not then it will save the changes to the current file. 3. To cut paste in a file. Ctrl+o is used to cut and Ctrl+u is used to paste the text. To cut and paste a whole line. Move to the line which you want to cut then press Ctrl+k. Now the line is moved to clipboard, To paste it, go to the position where you want to paste and then press Ctrl+u To cut and paste a whole line in nano text editor To cut and paste the selected text. Select the text which you want to cut then press Ctrl+k. Now the text is moved to clipboard. To paste it, go to the position where you want to paste and then press Ctrl+u. To cut and paste the selected text in nano text editor 4. To search a word in a file. Ctrl+w is used. Press Ctrl+w It will ask for a word to search for. Enter the word It will search for the word and will place the cursor in the first letter of the first occurrence of the word. To search a word in a file in nano text editor 5. To enable spell check in nano. First, install the spell check package. $sudo apt install spell It will then ask for the password then enter the password. Then press y and then press enter. To enable spell check in nano To do spell check first press Ctrl+t Now it will ask you to replace the incorrect words Enter the word to replace with there As soon as you will press the enter key

How to Use the Vim Text Editor in Linux | Vim has other mode...
5K views · Aug 20, 2023 monibe.com
How to Use the Vim Text Editor in Linux Step 1: Create and close a Vim file without saving Remember when I said I was scared to use Vim at first? Well, the scary part was thinking, "what if I change an existing file and mess things up?" After all, several computer science assignments required me to work on existing files by modifying them. I wanted to know: How can I open and close a file without saving my changes? The good news is you can use the same command to create or open a file in Vim: vim <FILE_NAME>, where <FILE_NAME> represents the target file name you want to create or modify. Let's create a file named HelloWorld.java by typing vim HelloWorld.java. Hello, Vim! Now, here is a very important concept in Vim, possibly the most important to remember: Vim has multiple modes. Here are three you need to know to do Vim basics: Vim has other modes, like Visual, Select, and Ex-Mode, but Normal, Insert, and Command Line modes are good enough for us. You are now in Normal mode. If you have text, you can move around with your arrow keys or other navigation keystrokes (which you will see later). To make sure you are in Normal mode, simply hit the Esc (Escape) key. Tip: Esc switches to Normal mode. Even though you are already in Normal mode, hit Esc just for practice's sake. Now, this will be interesting. Press : (the colon key) followed by q! (i.e., :q!). Your screen will look like this:

How to Use the Gedit Text Editor in Linux | install gedit | ...
3K views · Aug 20, 2023 monibe.com
How to Use the Gedit Text Editor in Linux Installation gedit is located in Ubuntu's Main repository and is installed by default. gedit can be installed in Kubuntu, Xubuntu and other distributions although additional libraries are necessary and will be installed on non-GNOME systems. To install gedit: Select gedit in Synaptic (System → Adminstration → Synaptic Package Manager) From a terminal or ALT-F2: sudo apt-get install gedit Opening gedit gedit incorporates a graphical user interface (GUI) and is opened by going to Applications → Accessories → Text Editor or by pressing Alt+F2 and typing gedit Command Line Tips Opening gedit via the command line allows the user to take advantage of several options unavailable from the GUI menu. If a path is not included in the startup command, gedit will look for the file in the current directory. If the file is not found, gedit will open a blank file with the file name entered on the command line: To open a specific file: gedit filename To open multiple files: gedit file1 file2 To edit system files such as sources.list and fstab, open it with administrative privileges. It is NOT recommended to manually run graphical applications with administrative privileges, but in case you insist to do it, be sure to use gksudo rather than sudo. gksudo gedit To open at a specific line number, useful when an error message includes the line number, include "+<line number>". (gksudo is used in this example since the file is a system file owned by root): gksudo gedit +21 /etc/apt/sources.list

How to Use the Filezilla FTP Client in Linux | FileZilla in ...
19K views · Aug 20, 2023 monibe.com
How to Use the Filezilla FTP Client in Linux When transferring files in Ubuntu, there are various options at your disposal but having a means that supports FTP is an added advantage. That’s why FileZilla is your best option. FileZilla is a free FTP client that allows the users to transfer the files via a network from one PC to another. With FileZilla, you don’t have to archive the files as it supports sftp connections. That way, you easily transfer your files with minimal traffic. Let’s check the installation steps for Ubuntu 22.04 and how to use it to transfer the files. Getting Started with FileZilla in Ubuntu 22.04 There are various ways to install FileZilla in Ubuntu. This guide offers the steps for the command line and a graphical way of installing FileZilla in Ubuntu 22.04.

How to Use the Transmission BitTorrent Client in Linux | Tra...
5K views · Aug 20, 2023 monibe.com
How to Use the Transmission BitTorrent Client in Linux Step 1: Open Ubuntu Command Terminal. Step 2: Add Transmission repository to Ubuntu. Step 3: Update the system. Step 3: Install Transmission on Ubuntu. Step 4: Run this torrent program. Step 4: Change Transmission RCP /web interface username and password. Step 5: Access Web interface of Transmission Ubuntu.
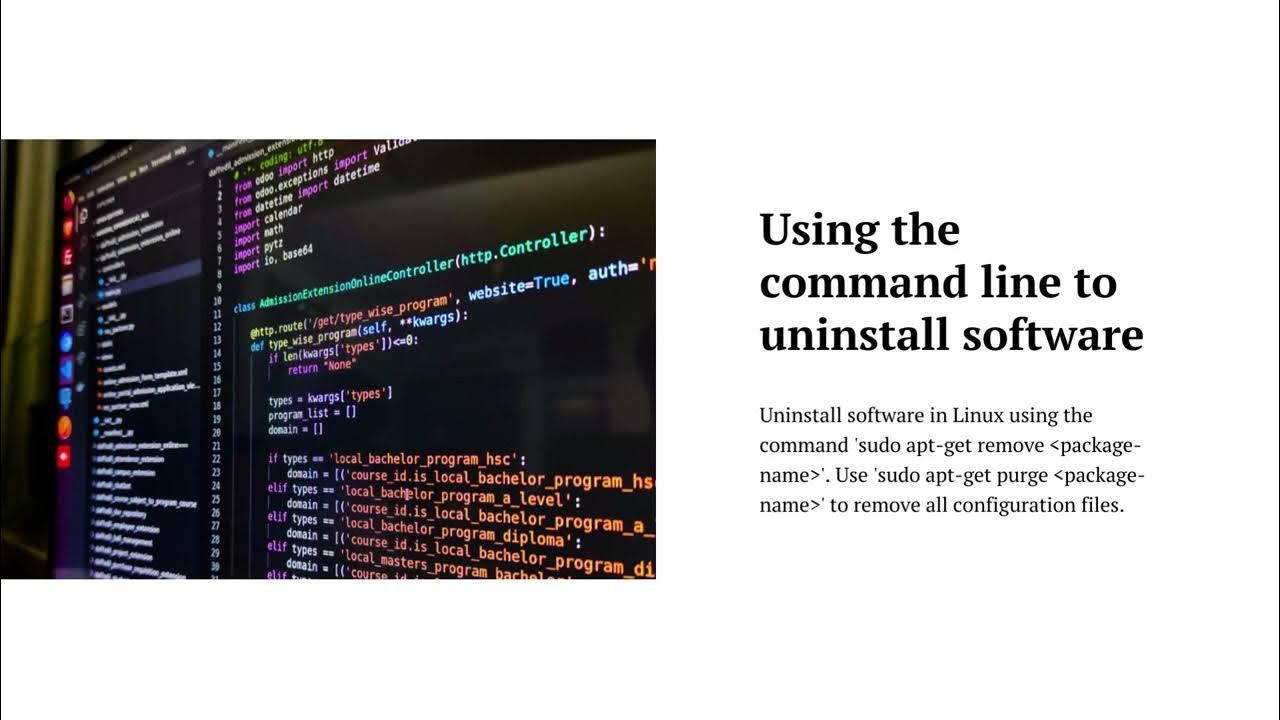
How to uninstall software in Linux | Using the command line
783 views · Sep 22, 2023 monibe.com
How to uninstall software in Linux There are two main ways to uninstall software in Linux: using the command line or using a graphical package manager. Using the command line To uninstall software using the command line, open a terminal window and navigate to the directory where the software is installed. Then, use the following command: sudo apt remove <package-name> Replace <package-name> with the name of the software you want to uninstall. For example, to uninstall the GIMP image editor, you would use the following command: sudo apt remove gimp You will be prompted to enter your password. Once you have entered your password, the software will be uninstalled. Using a graphical package manager Many Linux distributions come with a graphical package manager that allows you to uninstall software without having to use the command line. To use a graphical package manager, open the package manager and search for the software you want to uninstall. Once you have found the software, select it and click the "Uninstall" button. The package manager will uninstall the software and all of its dependencies. Which method should I use? If you are comfortable using the command line, then I recommend using the command line to uninstall software. It is the fastest and most reliable way to uninstall software. However, if you are not comfortable using the command line, then you can use a graphical package manager to uninstall software. Graphical package managers are easy to use and they provide a safe and reliable way to uninstall software. Additional tips If you are unsure about whether or not you should uninstall a particular software package, it is best to err on the side of caution and leave it installed. If you are uninstalling software that is part of your Linux distribution, it is important to make sure that you have a backup of your system before uninstalling the software. If you are uninstalling software that is not part of your Linux distribution, you may need to manually remove the software's configuration files.
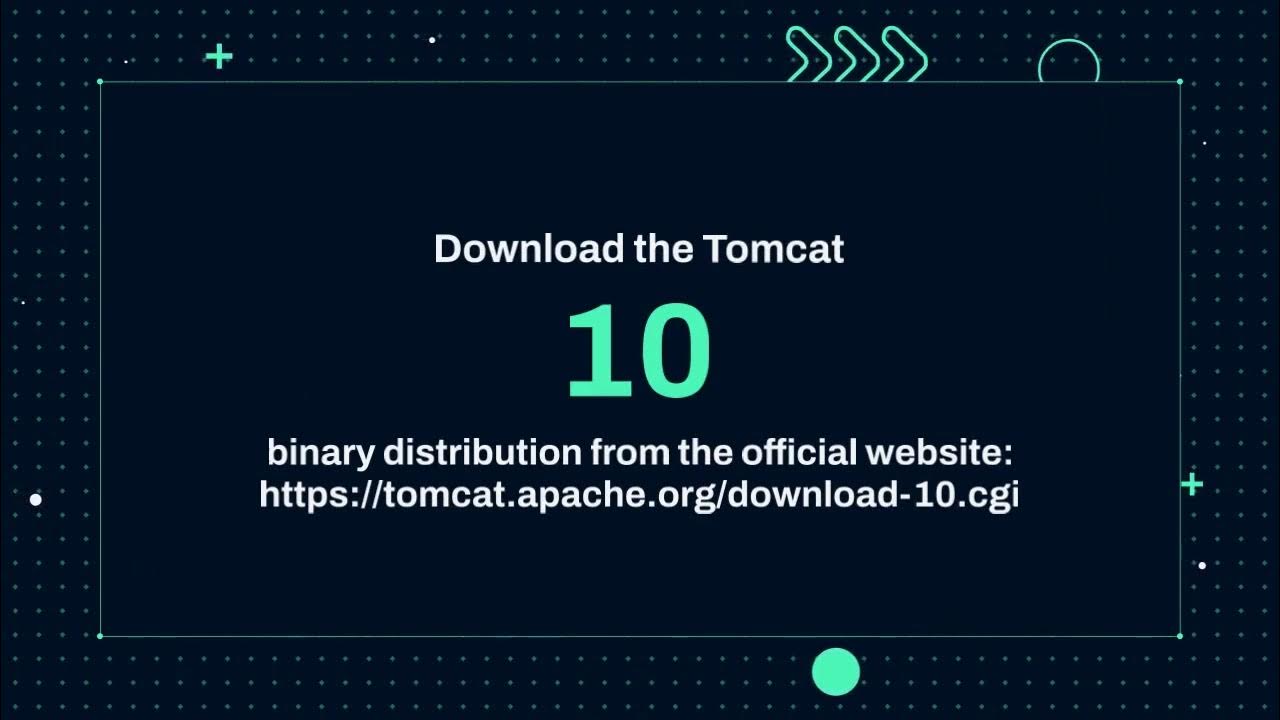
How to Install Tomcat 10 on Ubuntu 22 04 | Apache Tomcat 10 ...
1 views · Oct 2, 2023 monibe.com
To install Tomcat 10 on Ubuntu 22.04, follow these steps: Update your system packages: sudo apt update && sudo apt upgrade Install Java: sudo apt install openjdk-11-jdk Create a user for Tomcat: sudo adduser --system --group tomcat Download Tomcat: cd /opt sudo wget https://dlcdn.apache.org/tomcat/tomcat-10/v10.1.4/bin/apache-tomcat-10.1.4.tar.gz Extract Tomcat: sudo tar -xvf apache-tomcat-10.1.4.tar.gz Set permissions: sudo chown -R tomcat:tomcat apache-tomcat-10.1.4 Create a systemd service file for Tomcat: sudo nano /etc/systemd/system/tomcat.service Add the following contents to the file: [Unit] Description=Apache Tomcat 10 After=network.target [Service] Type=forking User=tomcat Group=tomcat Environment="JAVA_HOME=/usr/lib/jvm/openjdk-11-jdk" Environment="CATALINA_HOME=/opt/apache-tomcat-10.1.4" ExecStart=$CATALINA_HOME/bin/startup.sh ExecStop=$CATALINA_HOME/bin/shutdown.sh [Install] WantedBy=multi-user.target Reload the systemd daemon: sudo systemctl daemon-reload Enable the Tomcat service: sudo systemctl enable tomcat Start the Tomcat service: sudo systemctl start tomcat You can verify that Tomcat is running by visiting the following URL in your web browser: http://localhost:8080 If you see the Tomcat welcome page, then Tomcat is running successfully. Additional notes You can change the port that Tomcat listens on by editing the CATALINA_HOME/conf/server.xml file. You can add and manage web applications in Tomcat by editing the CATALINA_HOME/conf/web.xml file. You can learn more about Tomcat on the official Tomcat website: https://tomcat.apache.org/

How to Upgrade Debian 10 Buster to Debi | Upgrading Debian 1...
0 views · Oct 2, 2023 monibe.com
To upgrade Debian 10 Buster to Debian 11 Bullseye, you can follow these steps: Back up your data. This is very important, as there is always a risk of something going wrong during an upgrade. Update your existing packages and reboot your system. This will ensure that you have the latest versions of all of your packages installed. Change your Debian sources. You can do this by editing the /etc/apt/sources.list file and replacing all instances of buster with bullseye. Update your package cache. Run the following command: sudo apt update Upgrade your system. Run the following command: sudo apt full-upgrade This will upgrade all of your packages to the latest versions available for Debian 11 Bullseye. 6. Reboot your system. Once the upgrade is complete, you should reboot your system to ensure that all of the changes have taken effect. Once you have completed these steps, your system will be running Debian 11 Bullseye. Here are some additional tips for upgrading Debian: If you are using a third-party repository, make sure to check with the repository maintainers to see if they have instructions for upgrading to Debian 11 Bullseye. If you are running any custom applications or services, make sure to test them thoroughly after the upgrade to ensure that they are still working properly. If you encounter any problems during the upgrade, you can try searching for help online or contacting the Debian community for assistance. Warning: Upgrading your Debian system can be a risky process, so it is important to follow the instructions carefully and to back up your data before you begin.

How to Install Node js and npm on Ubuntu | Installation of N...
0 views · Oct 2, 2023 monibe.com
How to Install Node js and npm on Ubuntu To install Node.js and npm on Ubuntu, follow these steps: Update your system packages: sudo apt update && sudo apt upgrade Install Node.js and npm: sudo apt install nodejs Verify that Node.js and npm are installed correctly: node --version npm --version You should see the current versions of Node.js and npm printed to the console. If you want to install a specific version of Node.js, you can use the following command: sudo apt install nodejs=specific_version For example, to install Node.js 18.12.1, you would run the following command: sudo apt install nodejs=18.12.1 Once you have installed Node.js and npm, you can start using them to develop and run JavaScript applications. Here are some additional tips: If you are using a Node.js version manager, such as nvm or n, you can use that to install and manage multiple versions of Node.js on your system. If you are developing a Node.js application, you may need to install additional packages using npm. For example, to install the Express web framework, you would run the following command: npm install express You can learn more about Node.js and npm on the official Node.js website: https://nodejs.org/

Python basics and fundamentals | Conditional statements | Lo...
3K views · Oct 5, 2023 monibe.com
Python is a general-purpose programming language that is used for a wide variety of tasks, including web development, data science, machine learning, and scripting. Python is known for its simplicity and readability, making it a good choice for beginners and experienced programmers alike. Here are some of the basics and fundamentals of Python: Variables: Variables are used to store data. To create a variable, you simply assign a value to it using the equals sign (=). For example: Python my_variable = 10 Use code with caution. Learn more This creates a variable called my_variable and assigns it the value 10. Data types: Python has a variety of data types, including integers, floats, strings, and booleans. Each data type has its own set of rules and operations. For example, integers can be added, subtracted, multiplied, and divided, while strings can be concatenated and split. Operators: Operators are used to perform operations on data. Python has a variety of operators, including arithmetic operators, relational operators, logical operators, and assignment operators. For example, the + operator is used to add two numbers, while the > operator is used to check if one number is greater than another. Conditional statements: Conditional statements are used to control the flow of a program. Python has two main types of conditional statements: if statements and elif statements. An if statement checks if a condition is true, and if it is, then the code block inside the if statement is executed. An elif statement is used to check if a different condition is true, if the previous condition was not true. Loops: Loops are used to repeat a block of code until a condition is met. Python has two main types of loops: for loops and while loops. A for loop repeats a block of code for a specified number of times, while a while loop repeats a block of code until a condition is false. Functions: Functions are used to group together related code and to make it reusable. To define a function, you use the def keyword. For example: Python def my_function(): print("Hello, world!") Use code with caution. Learn more This defines a function called my_function(). To call the function, you simply type its name followed by parentheses. For example: Python my_function() Use code with caution. Learn more This will print the message "Hello, world!" to the console. These are just a few of the basics and fundamentals of Python. There is much more to learn about Python, but this should give you a good foundation to start with. There are many resources available online and in libraries to help you learn more about Python. Here are some tips for learning Python: Start with the basics. Make sure you have a good understanding of variables, data types, operators, conditional statements, loops, and functions. Practice regularly. The best way to learn Python is by practicing. Try to write Python code every day, even if it's just for a few minutes. Use online resources and libraries. There are many great resources available online and in libraries to help you learn Python. Don't be afraid to ask for help if you get stuck. Find a mentor. If you know someone who is experienced with Python, ask them to mentor you. They can help you learn the language and answer any questions you have. Learning Python can be challenging, but it is also rewarding. Python is a powerful language that can be used to develop a wide variety of applications. With a little effort, you can learn Python and start developing your own applications.
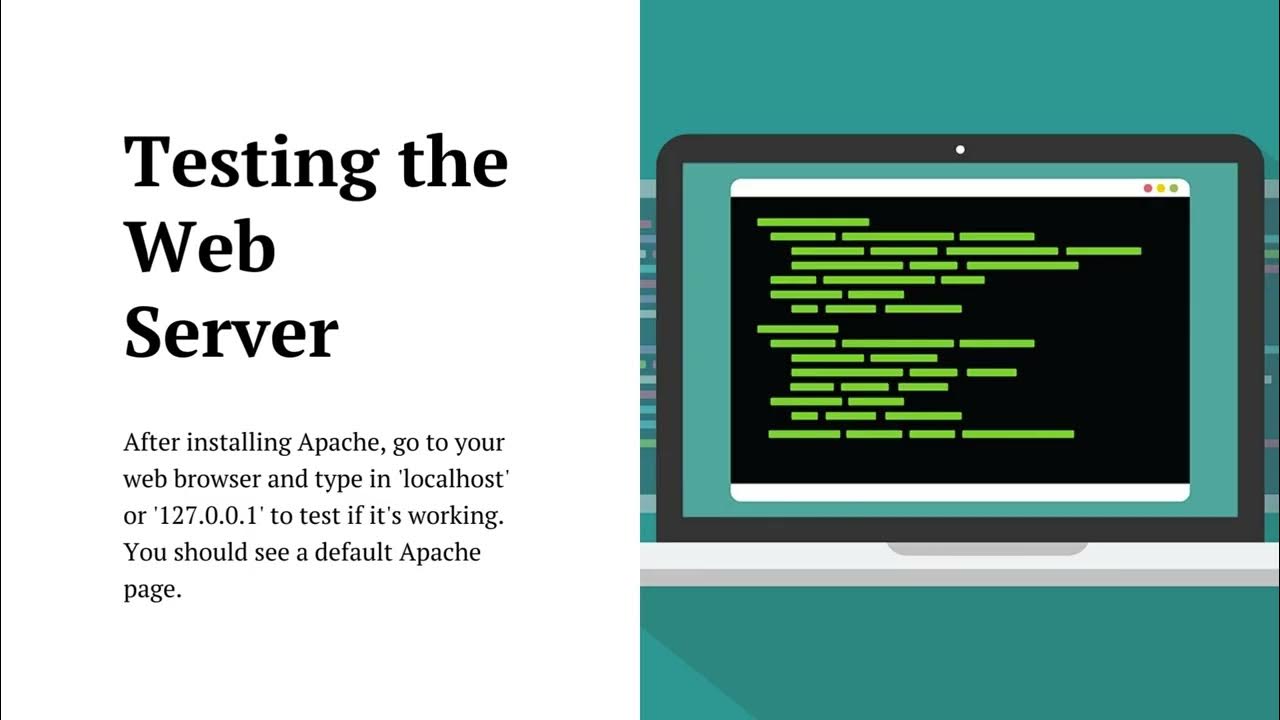
How to install & configure Apache web server in Linux | ...
3K views · Oct 5, 2023 monibe.com
How to install and configure Apache web server in Linux To install and configure Apache web server in Linux, follow these steps: Update your system packages. This will ensure that you have the latest versions of all of your packages installed. Run the following command: sudo apt update && sudo apt upgrade Install Apache. The name of the Apache package varies depending on the Linux distribution you are using. For example, on Ubuntu and Debian, the package is called apache2, while on CentOS and Fedora, the package is called httpd. To install Apache, run the following command: sudo apt install apache2 Start Apache. Once Apache is installed, you can start it by running the following command: sudo systemctl start apache2 Verify that Apache is running. To verify that Apache is running, you can check the status of the Apache service by running the following command: sudo systemctl status apache2 Configure Apache. The default configuration file for Apache is located at /etc/apache2/apache2.conf. You can edit this file to configure Apache to your liking. For example, you can change the port that Apache listens on or you can add additional virtual hosts. Restart Apache. Once you have made any changes to the Apache configuration file, you need to restart Apache for the changes to take effect. To restart Apache, run the following command: sudo systemctl restart apache2 Now that Apache is installed and configured, you can start creating web pages and deploying them to your web server. Here are some additional tips for installing and configuring Apache: If you are using a firewall, you need to make sure that the firewall is configured to allow traffic on port 80, which is the default port that Apache listens on. If you are using a virtual host, you need to create a configuration file for the virtual host. The virtual host configuration file should be placed in the /etc/apache2/sites-available directory. Once you have created the virtual host configuration file, you need to enable the virtual host. To do this, run the following command: sudo a2ensite virtual_host_name.conf After you have enabled the virtual host, you need to restart Apache for the changes to take effect. Learning how to install and configure Apache is an essential skill for any web developer or system administrator. By following the steps above, you can easily install and configure Apache on your Linux system.
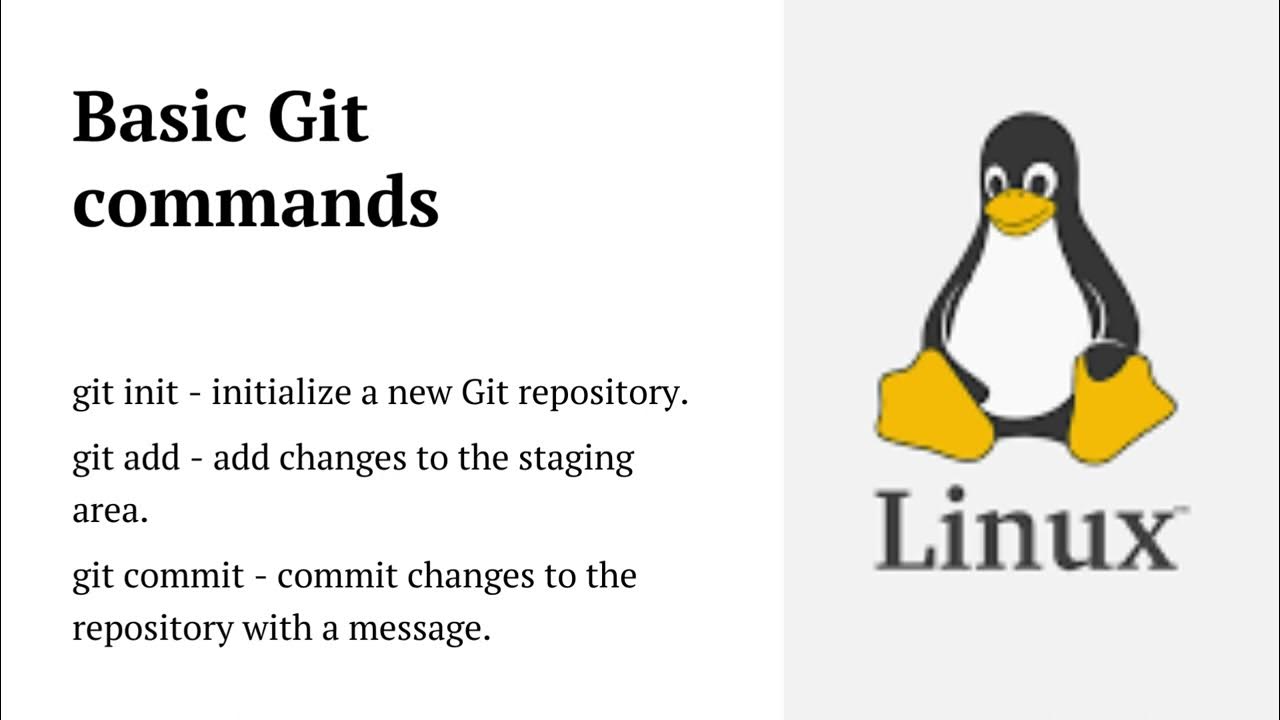
How to use Git in Linux | How to use git and GitHub in Linux...
2K views · Oct 5, 2023 monibe.com
To use Git in Linux, you will need to install the Git package. You can do this using your Linux distribution's package manager. For example, on Ubuntu and Debian, you can install Git with the following command: sudo apt install git Once Git is installed, you can create a new Git repository by running the following command: git init This will create a new directory called .git in the current directory. This directory contains all of the Git metadata for the repository. To add files to your Git repository, you can use the git add command. For example, to add all of the files in the current directory to the repository, you would run the following command: git add . Once you have added files to the repository, you can commit them with the git commit command. A commit is a snapshot of the state of the repository at a given point in time. To commit the files that you have added to the repository, you would run the following command: git commit -m "Your commit message" The commit message is a brief description of the changes that you have made to the repository. To push your changes to a remote repository, you can use the git push command. For example, to push your changes to the origin remote repository, you would run the following command: git push origin master The master branch is the default branch in Git. You can create and switch to other branches using the git branch command. To pull changes from a remote repository, you can use the git pull command. For example, to pull changes from the origin remote repository, you would run the following command: git pull origin master This will update your local repository with the latest changes from the remote repository. These are just a few of the basic Git commands. There are many other Git commands that you can use to manage your code and collaborate with other developers. You can learn more about Git commands and concepts from the official Git documentation. Here are some additional tips for using Git in Linux: Use a graphical Git client, such as GitKraken or GitHub Desktop. These clients can make it easier to use Git, especially if you are new to Git. Use Git branches to isolate your changes. This will allow you to experiment with new features or fix bugs without affecting the production code. Use Git commits to track your changes. This will make it easy to revert to a previous version of your code if necessary. Use Git pull requests to collaborate with other developers. This will allow you to review and merge changes from other developers into your codebase. Learning how to use Git is an essential skill for any software developer. By following the tips above, you can start using Git to manage your code and collaborate with other developers.